Tridium Niagara 4
Integrate Airthings into Niagara 4
This document describes how to integrate Airthings' API into Niagara 4 and collect data from Airthings sensors. The Niagara Framework is a building automation system allowing for integration and control of the technical systems in your building.
Getting started
To start with the integration you will need the following:
- Airthings for Business account and at least one sensor in your account
- An instance of Niagara 4 running on a JACE or a server
- One of the following drivers for your Niagara 4 instance:
Make sure you have all of your devices and software updated to the most recent version before starting with the integration.
Active Framework REST Network
To use the Active Framework REST Network, make sure you have a valid license for the driver on your Niagara 4 instance. You will have to set up an API client in the Airthings Dashboard to access the data, so lets start with that.
Airthings Dashboard Client Setup
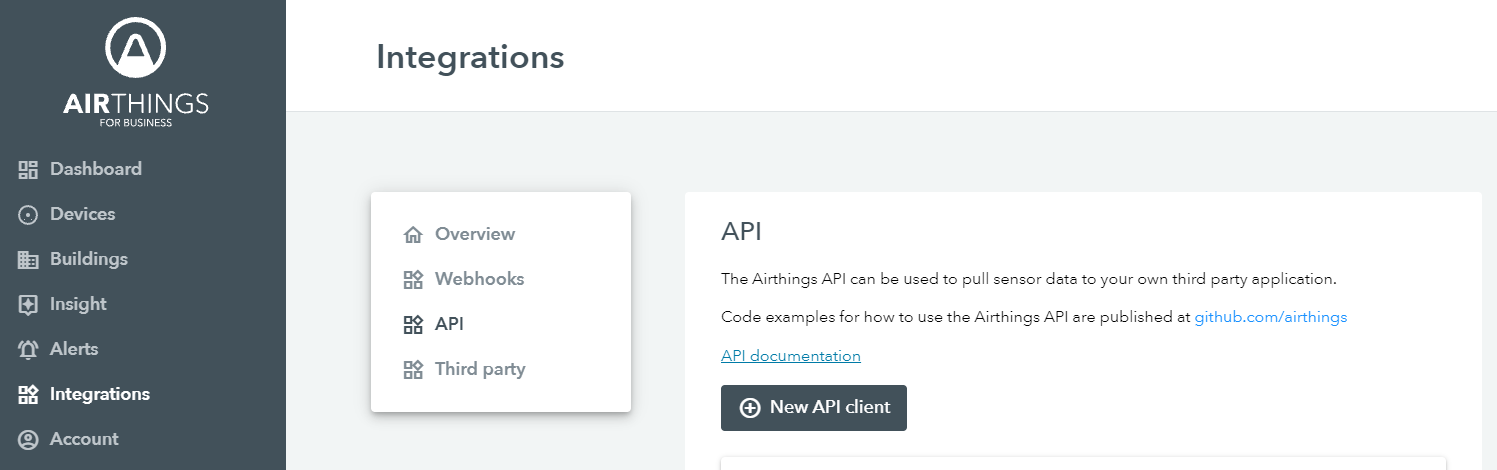
Log in to your user account at dashboard.airthings.com and navigate to Integrations. Click on API and then New API client.
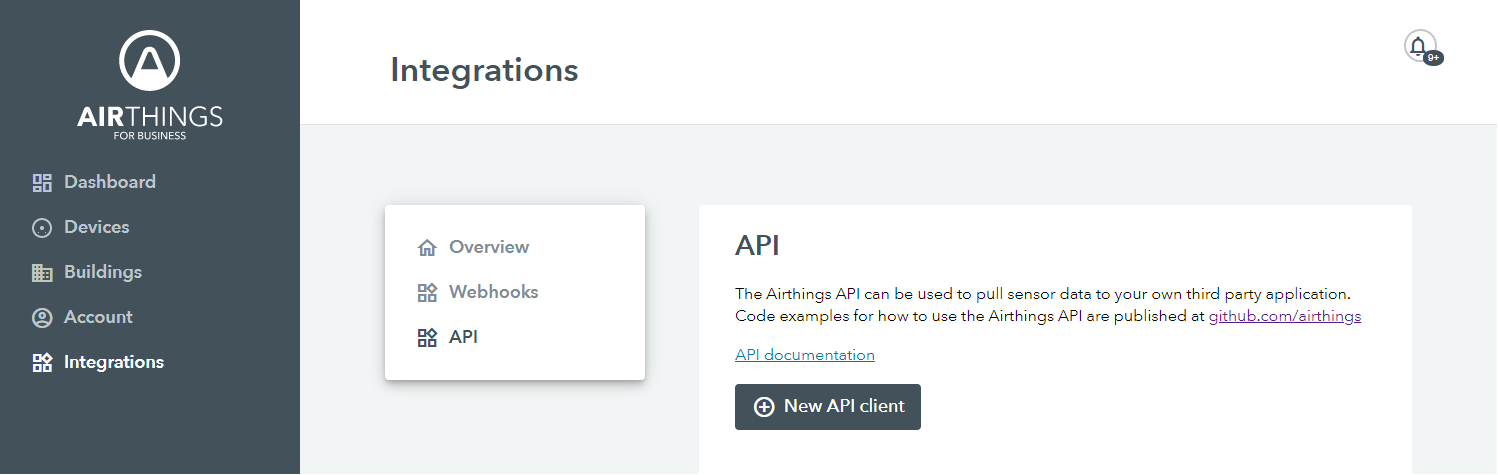
Name your API client and add a description if you’d like. Check the “Confidential” box and select “Client credentials” as flow type.

Make sure your API client is enabled and remember to save the client before continuing.
Niagara 4 setup
After a license for Active Framework REST Network is acquired, follow their instructions for downloading and installing the driver.
Adding the REST Network
With the driver installed to the host, add the RestNetwork driver to the station and enter the following settings in the HTTP config:
-   hostname: ext-api.airthings.com
-   protocol: https
-   method: Get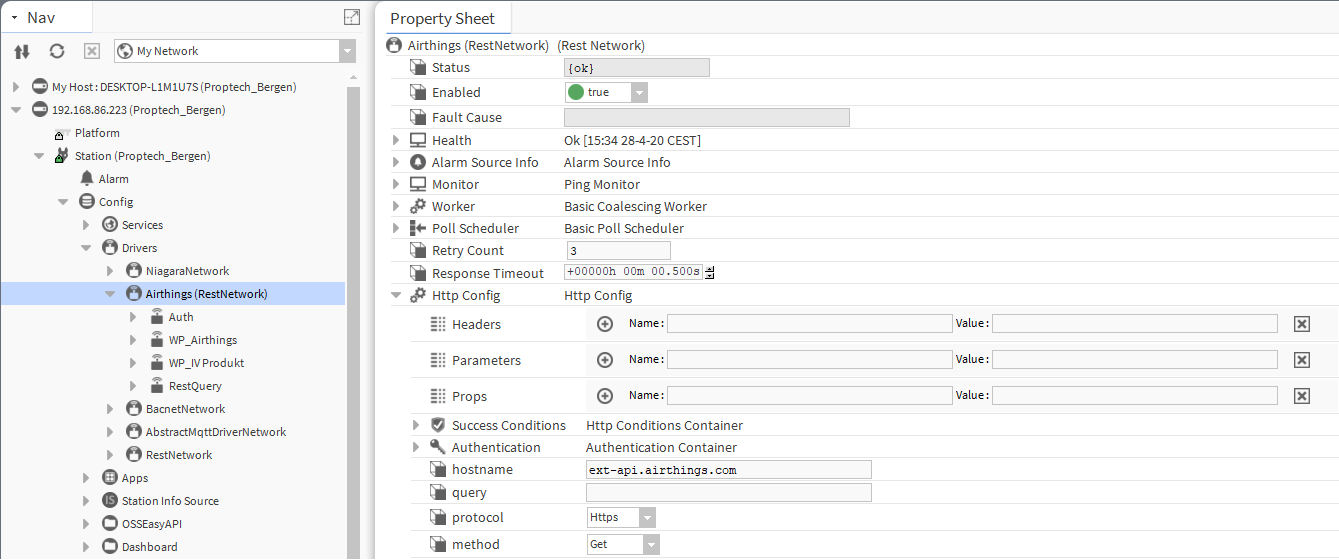
Creating authorization function
In order to authorize the communication, a valid access token must be provided with every request, so in order to obtain this we will add a device for this purpose.
After the device (Auth) has been added, you will have to make some overriding properties to it’s Http Config because of the endpoint being different from the one used to get data from devices. Right click on the Http Config, select Actions and “Add Overriding Property” to add the following properties:
-   hostname: [accounts-api.airthings.com](http://accounts-api.airthings.com/ "http://accounts-api.airthings.com")
-   query: /v1/token
-   method: Post
-   body:
    {
        "grant_type":"client_credentials",
        "client_id":"YOUR_CLIENT_ID",
        "client_secret":"YOUR_CLIENT_SECRET"
    }
Replace YOUR_CLIENT_ID with the client ID provided in the Airthings Dashboard client setup and replace YOUR_CLIENT_SECRET with the secret provided in the Airthings Dashboard client setup.
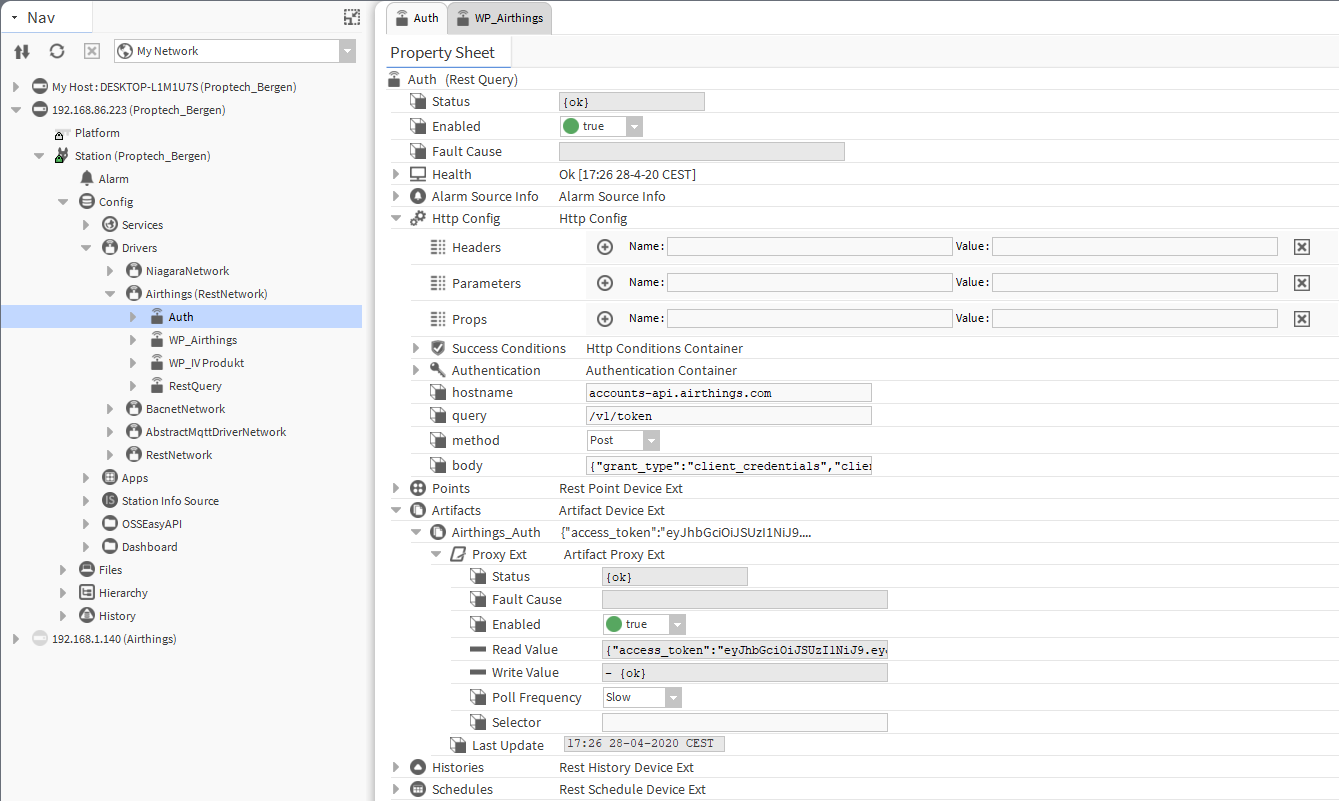
The token will be stored under “Artifacts” in this device, and it will be used for authenticating the sensor-data requests. Create an artifact here and name it “Airthings_Auth”.
Collecting data from a sensor
In order to get data from a sensor, a new device must be added to the REST Network. Add the following information in the header under Http Config in the new device:
- Name: Authorization
- Value: Bearer ${Airthings_Auth.access_token}
This will make the requests include the token obtained by the Auth-device and getting permission to get sensor data.
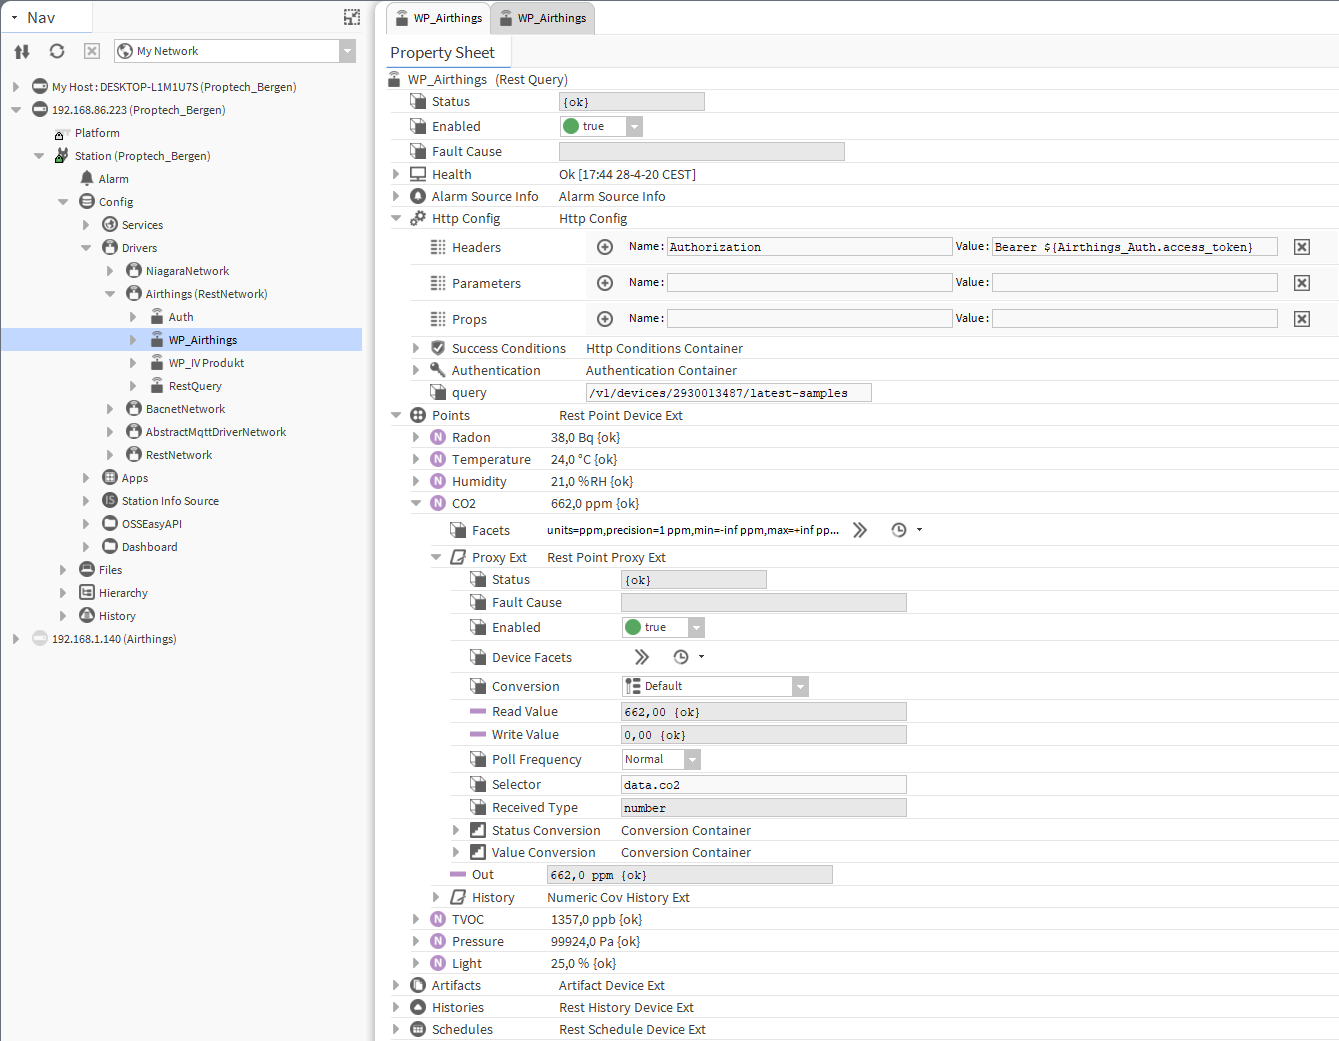
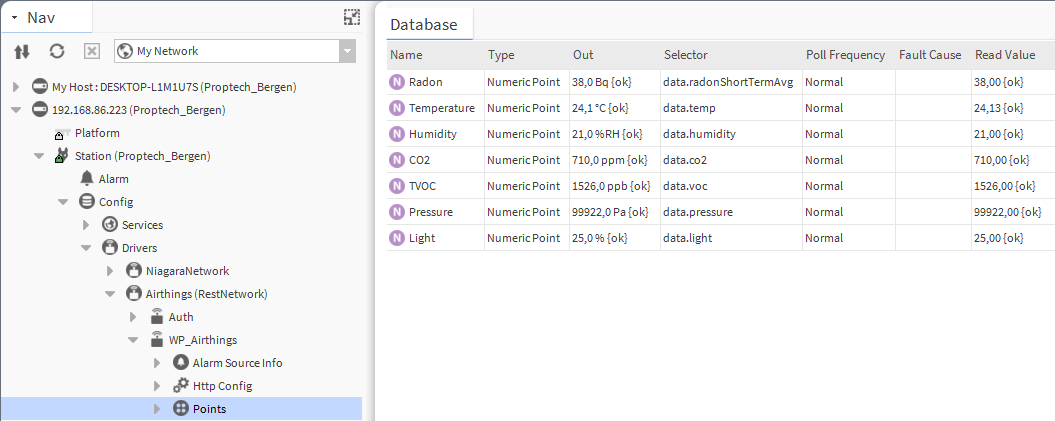
Add a query overriding property in the Http Config with the endpoint /v1/devices/2930013487/latest-samples where 2930013487 is a sensor S/N that should be replaced with the sensor you would like to collect data from. This sensor has to be registered in the account where the API client was created in order to get permission to collect data from it.
Finally, add points for the different sensor values. Configure the selector for each sensor according to the JSON-format in the API-documentation to separate the data to different Niagara objects.
OneSight Solutions Easy API
To use OSS Easy API, make sure you have a valid license for the driver on your Niagara 4 instance. You will have to set up an API client in the Airthings Dashboard to access the data, so lets start with that.
Airthings Dashboard Client Setup
After signing in to dashboard.airthings.com with your administrator user, go to the Integration page, select API, and add a new API client.
Select the scope read_device and use Client credentials (machine-to-machine) authentication flow with confidential access.
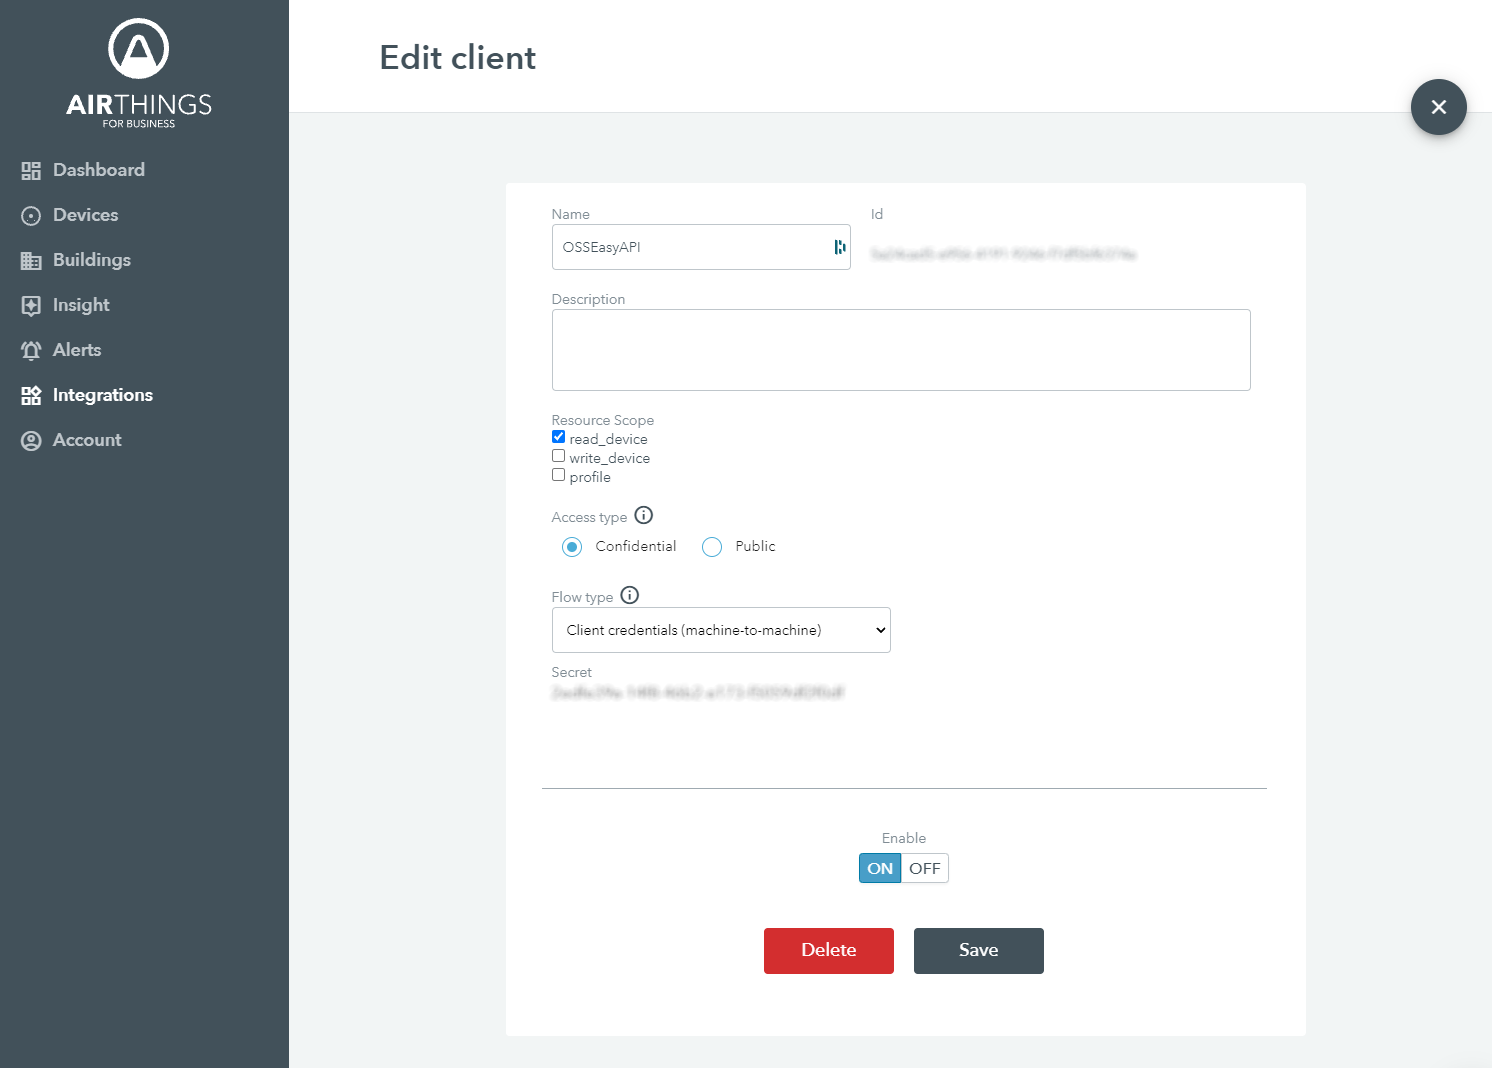
Make sure your API client is enabled and remember to save the client before continuing.
Niagara 4 setup
After a license for OSS Easy API has been acquired, follow their instructions for downloading and installing the driver.
Authorization
Add an OSS Easy API Request in Niagara for authentication purposes. Use the following settings:
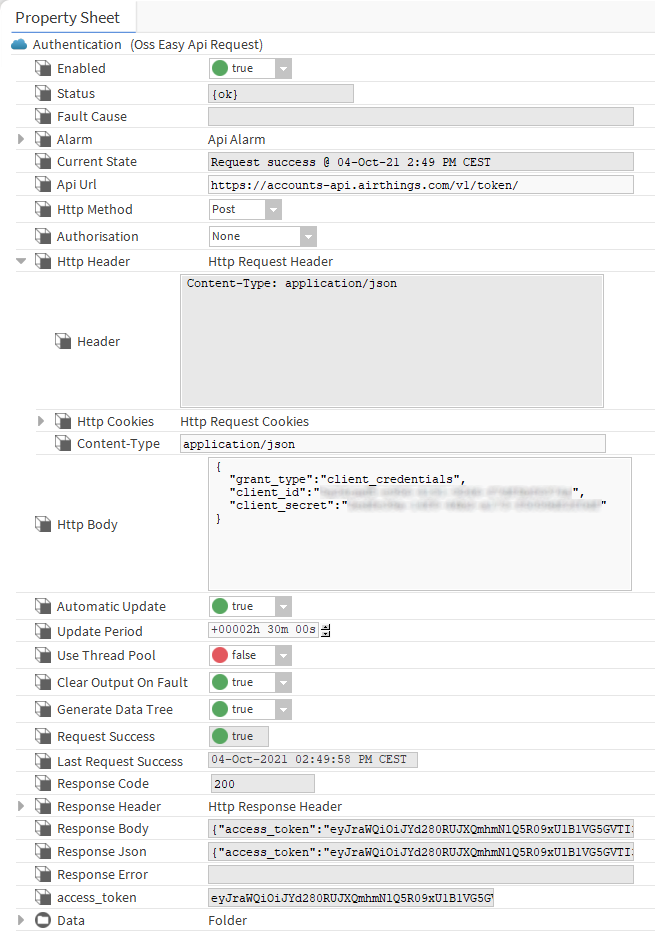
Enter the client ID and secret from the API client on the Dashboard in the JSON string on the request body.
Use composite (right click → Composite) to extract the access_token value from the data object, this token will be used to authorize any requests made to the Airthings API. The token expires after 3 hours, so the update period should be set to a shorter time to make sure you always have a valid authorization token for your requests.
Latest samples from a location
To avoid excessive API requests and potentially hitting the rate limit, it is recommended to use the location latest samples endpoint to get sensor samples from all sensors at the location you want to get data from. To do this, add an OSS Easy API Request with the following settings:

The URL (ext-api.airthings.com/v1/locations/**{locationId}**/latest-samples) should include the location ID where you want to retrieve device data from, and can be found either by using another API request or by looking at the URL from the building page in the Dashboard.
The bearer token is extracted from the authentication request made in the previous section.
Device samples
Add a JSON Path object together with a JSON Tree object and link them together like this to extract samples from a specific device:
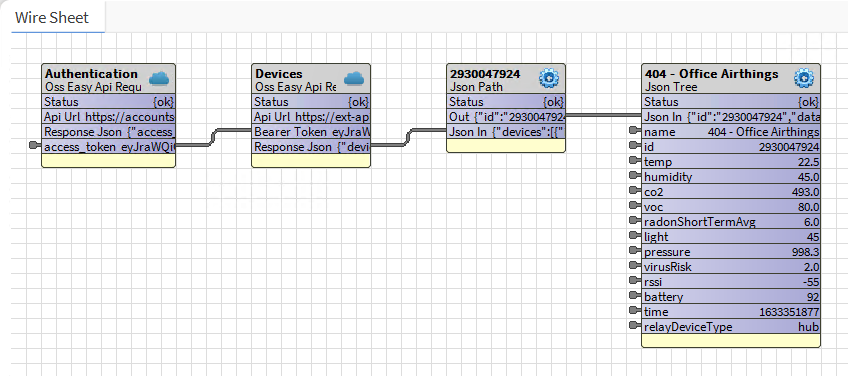
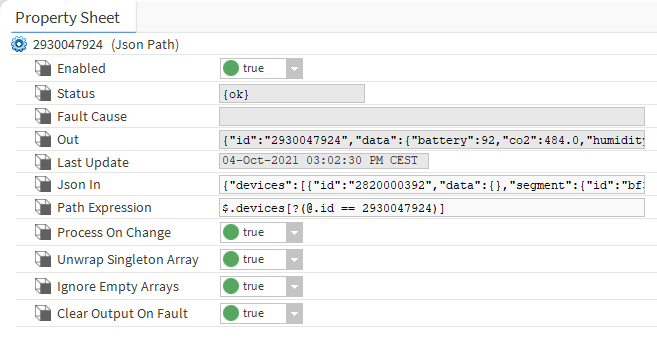
Use the serial number of the device you want to extract the data from in the path expression property of the JSON Path object:
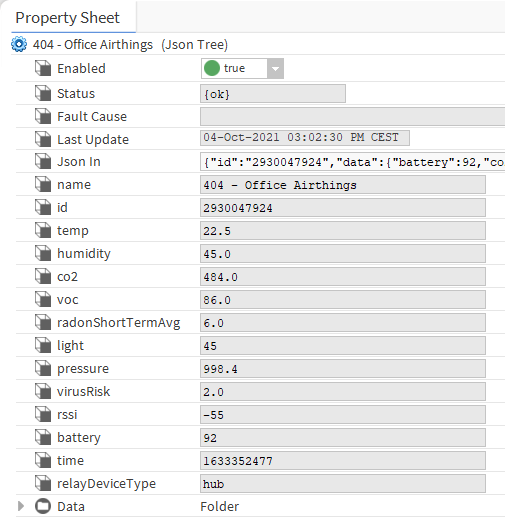
Use composite to extract the values you want to use from the device in the JSON Tree object:
Updated over 1 year ago