Getting started
How to get started using Airthings MQTT
It's necessary to create Airthings MQTT client with its ID and certificate. You can either get a certificate and a private key from us or upload a self-signed certificate to authorize your client.
For the purpose of demonstration, MQTT explorer will be used to connect and subscribe to the MQTT broker.
Requirements
- Access to an Airthings for Business account and its
accountId - An onboarded, online device within the account
Create Airthings MQTT client
-
Navigate to MQTT Integration in dashboard
-
Create a client

-
Download/upload a certificate to activate the client. Uploading a certificate only allow file types of
.cert
and.pem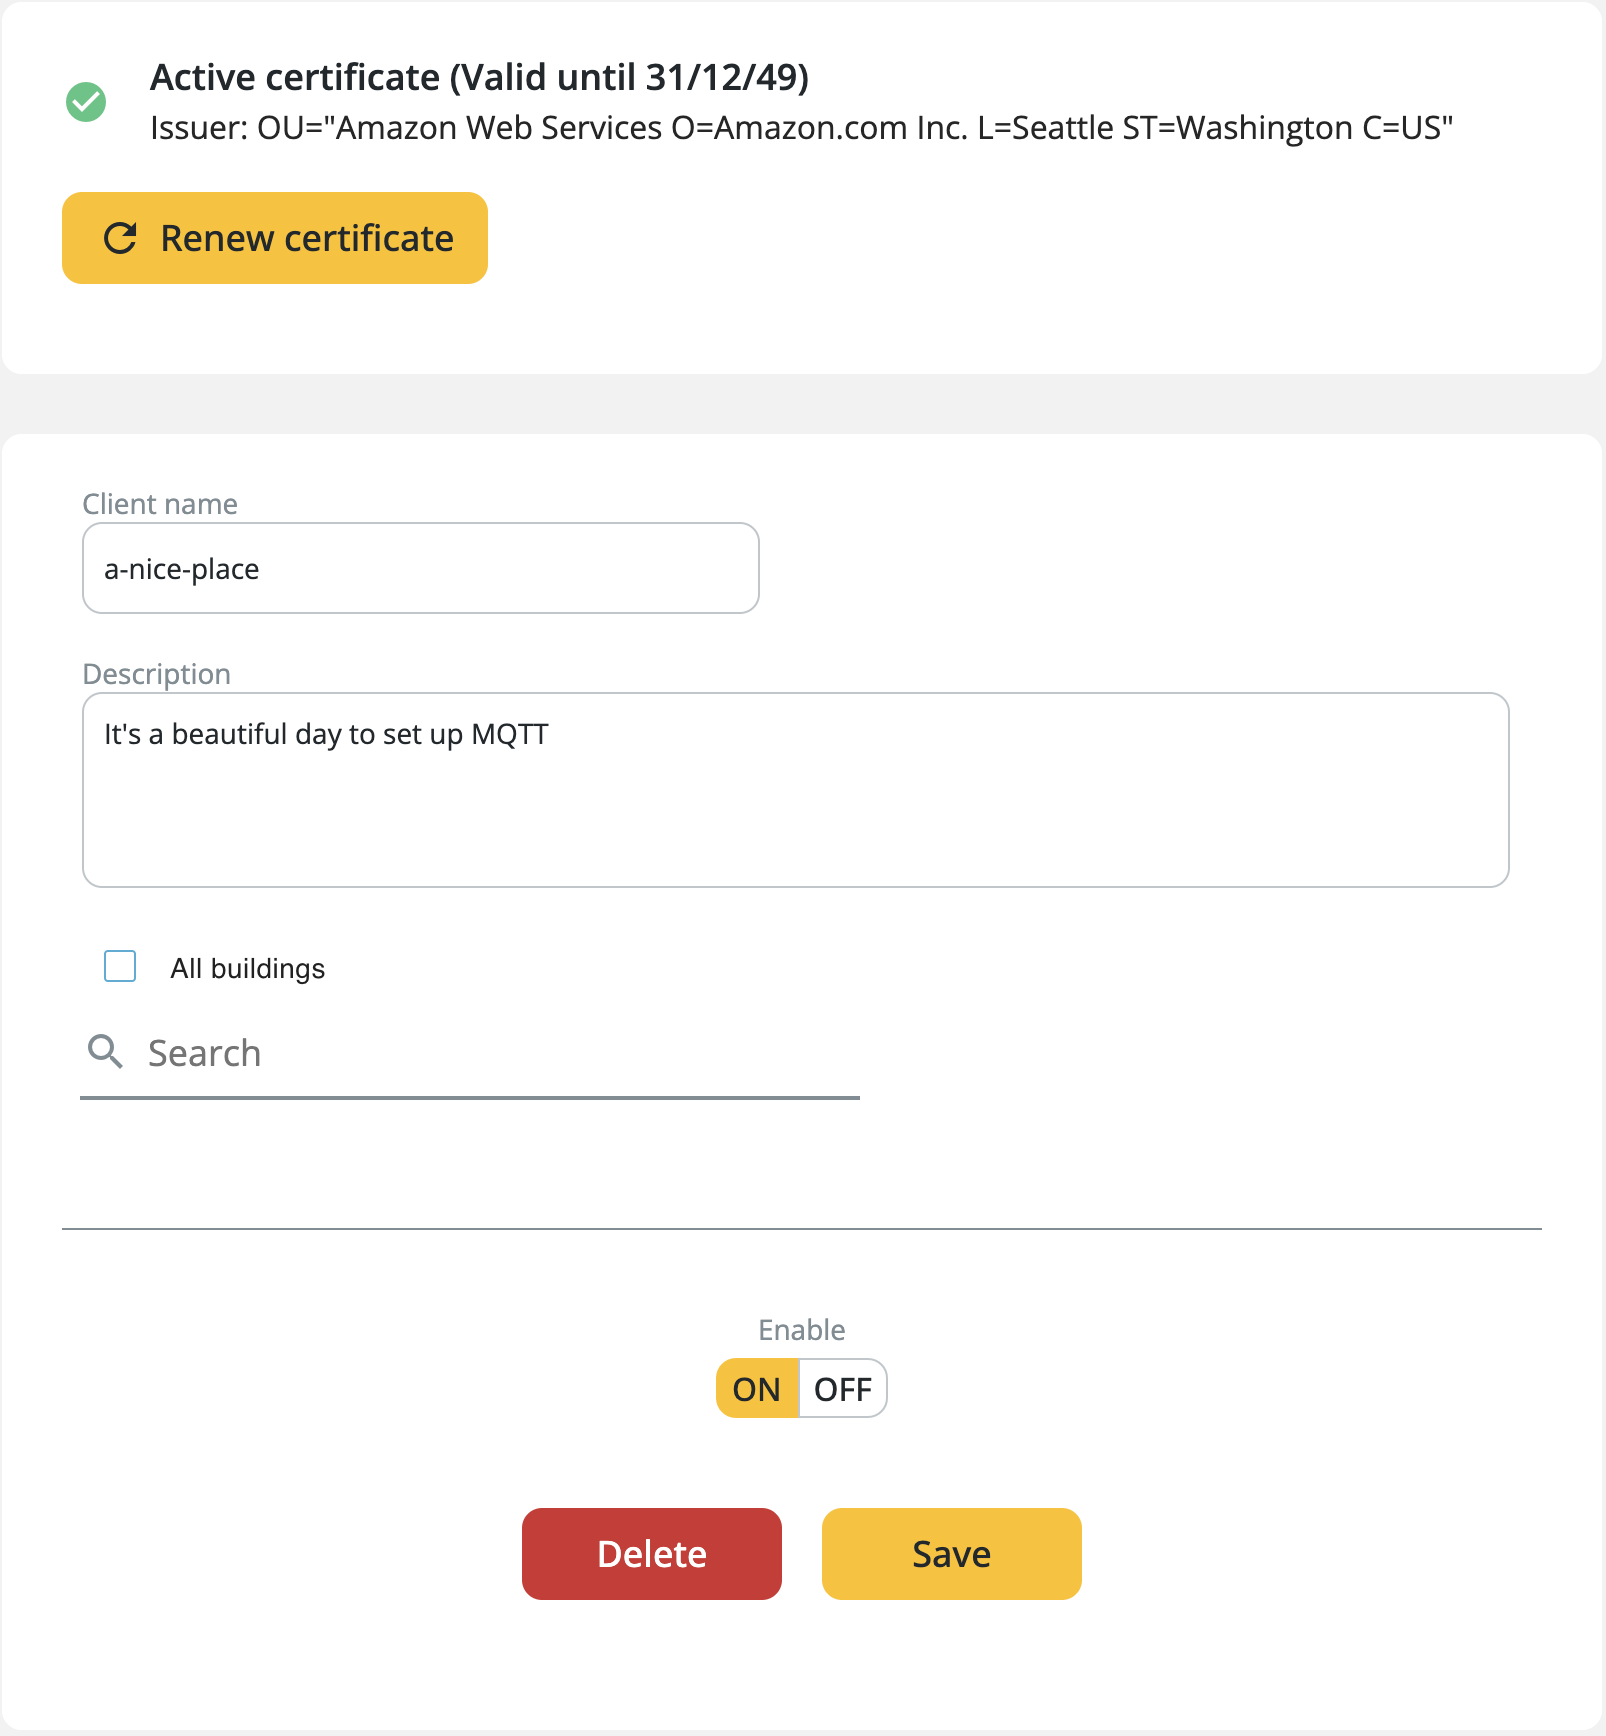
-
Add the location(s) you want the client to subscribe to
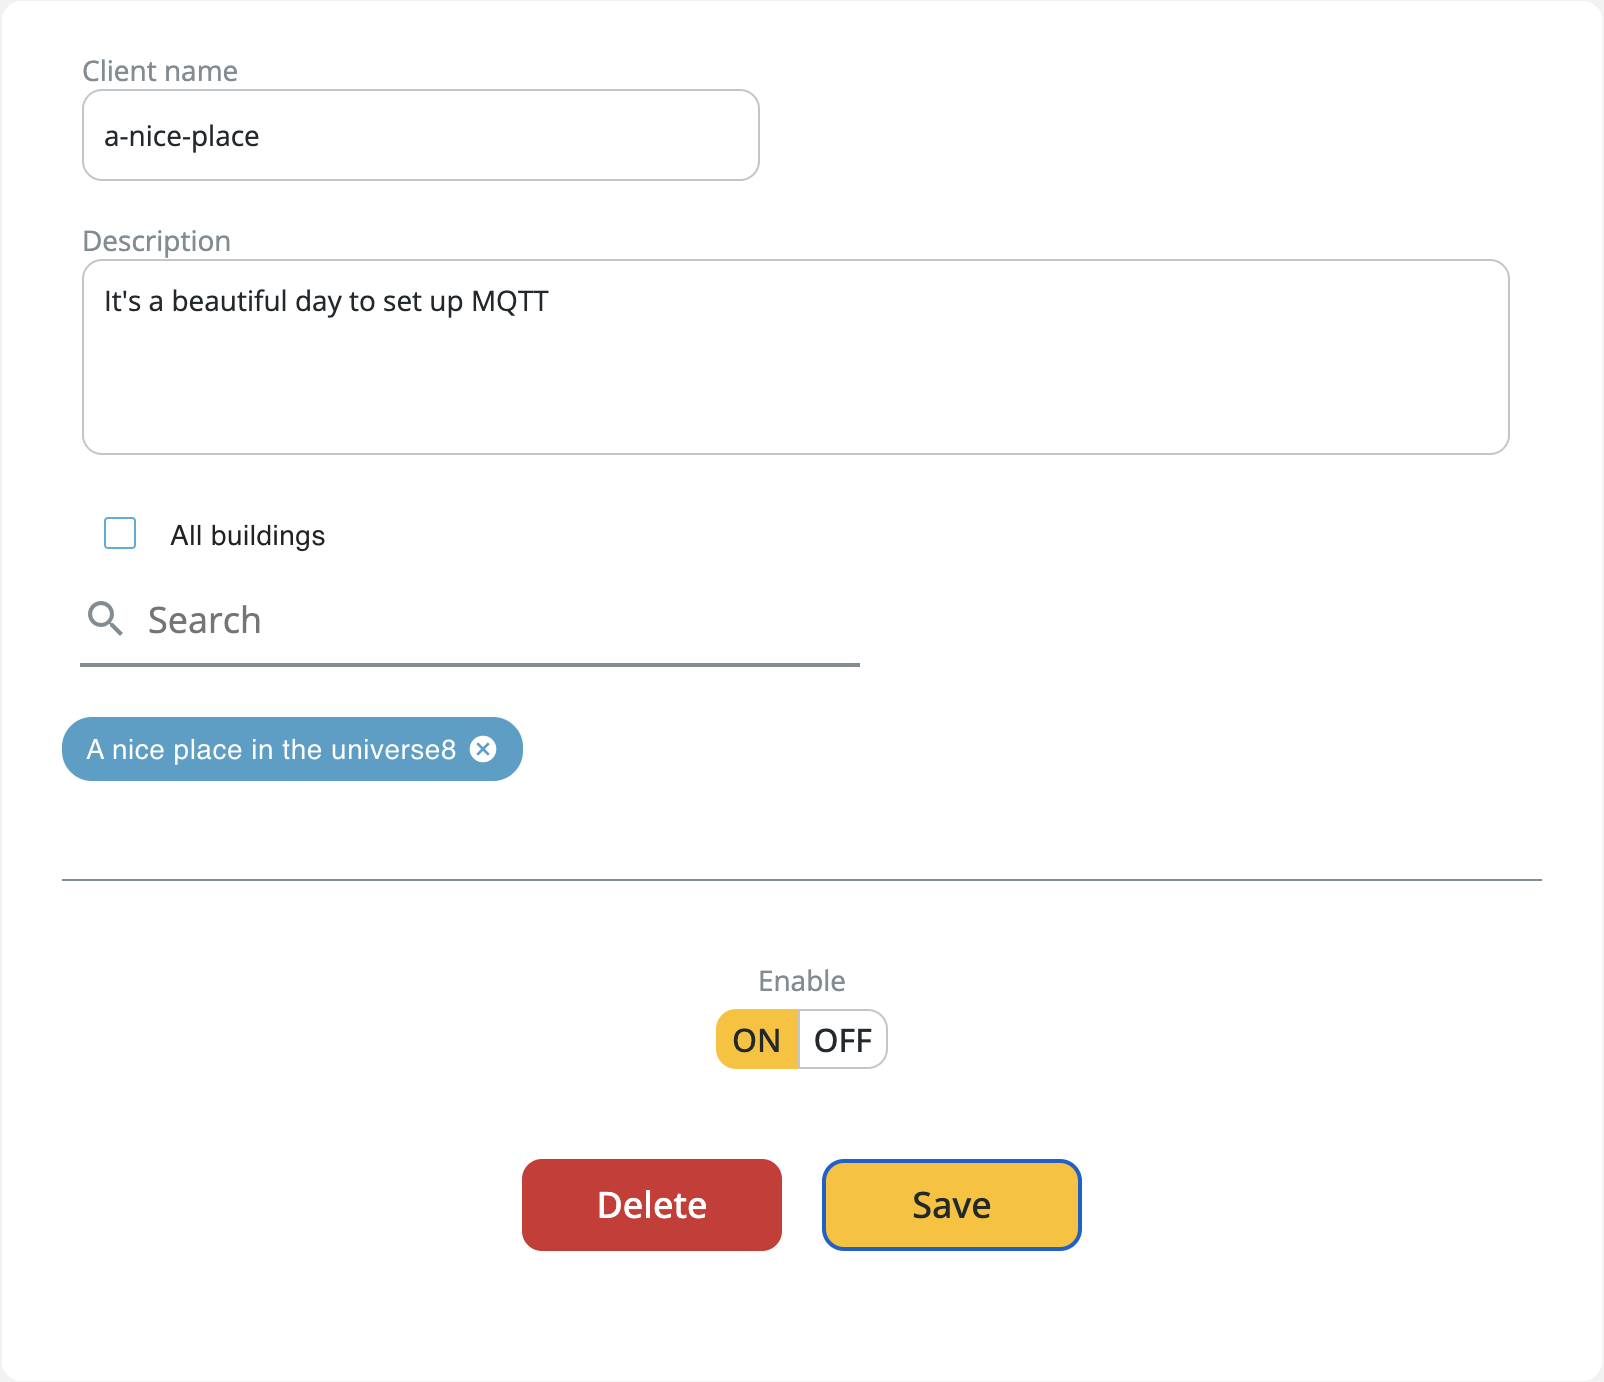
After a client is created, you are now ready to connect and receive data from us.
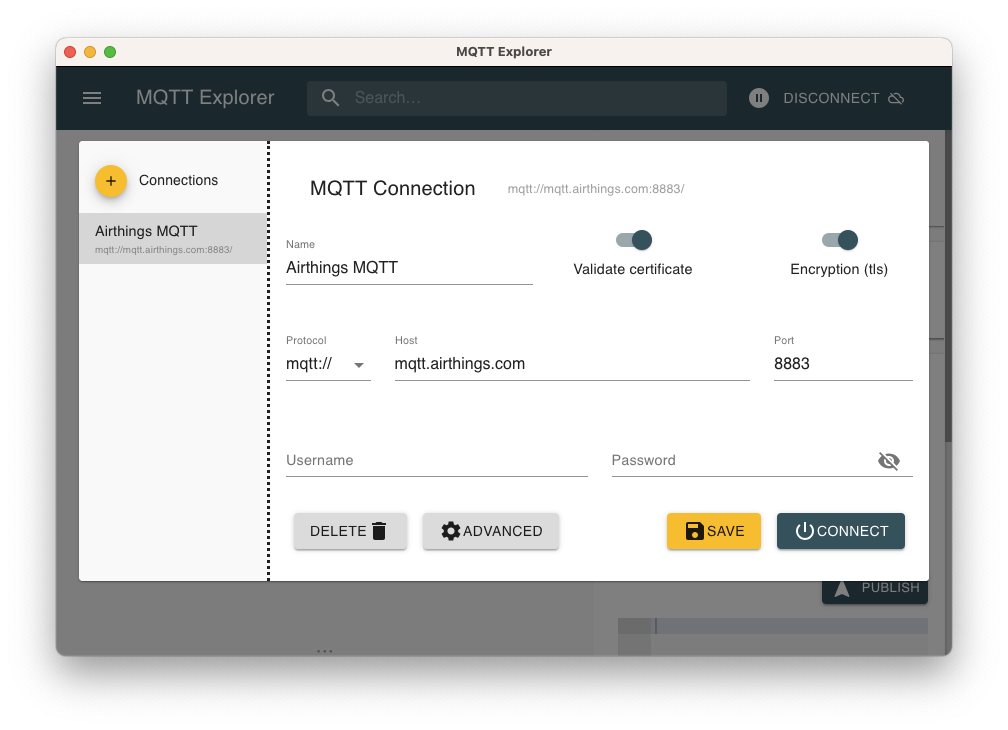
Connect to Airthings MQTT Broker
Use the following connection details:
| Field | Value |
|---|---|
| Protocol | mqtts or mqtt with Use TLS/SSL option |
| Host | mqtt.airthings.com |
| Port | 8883 |
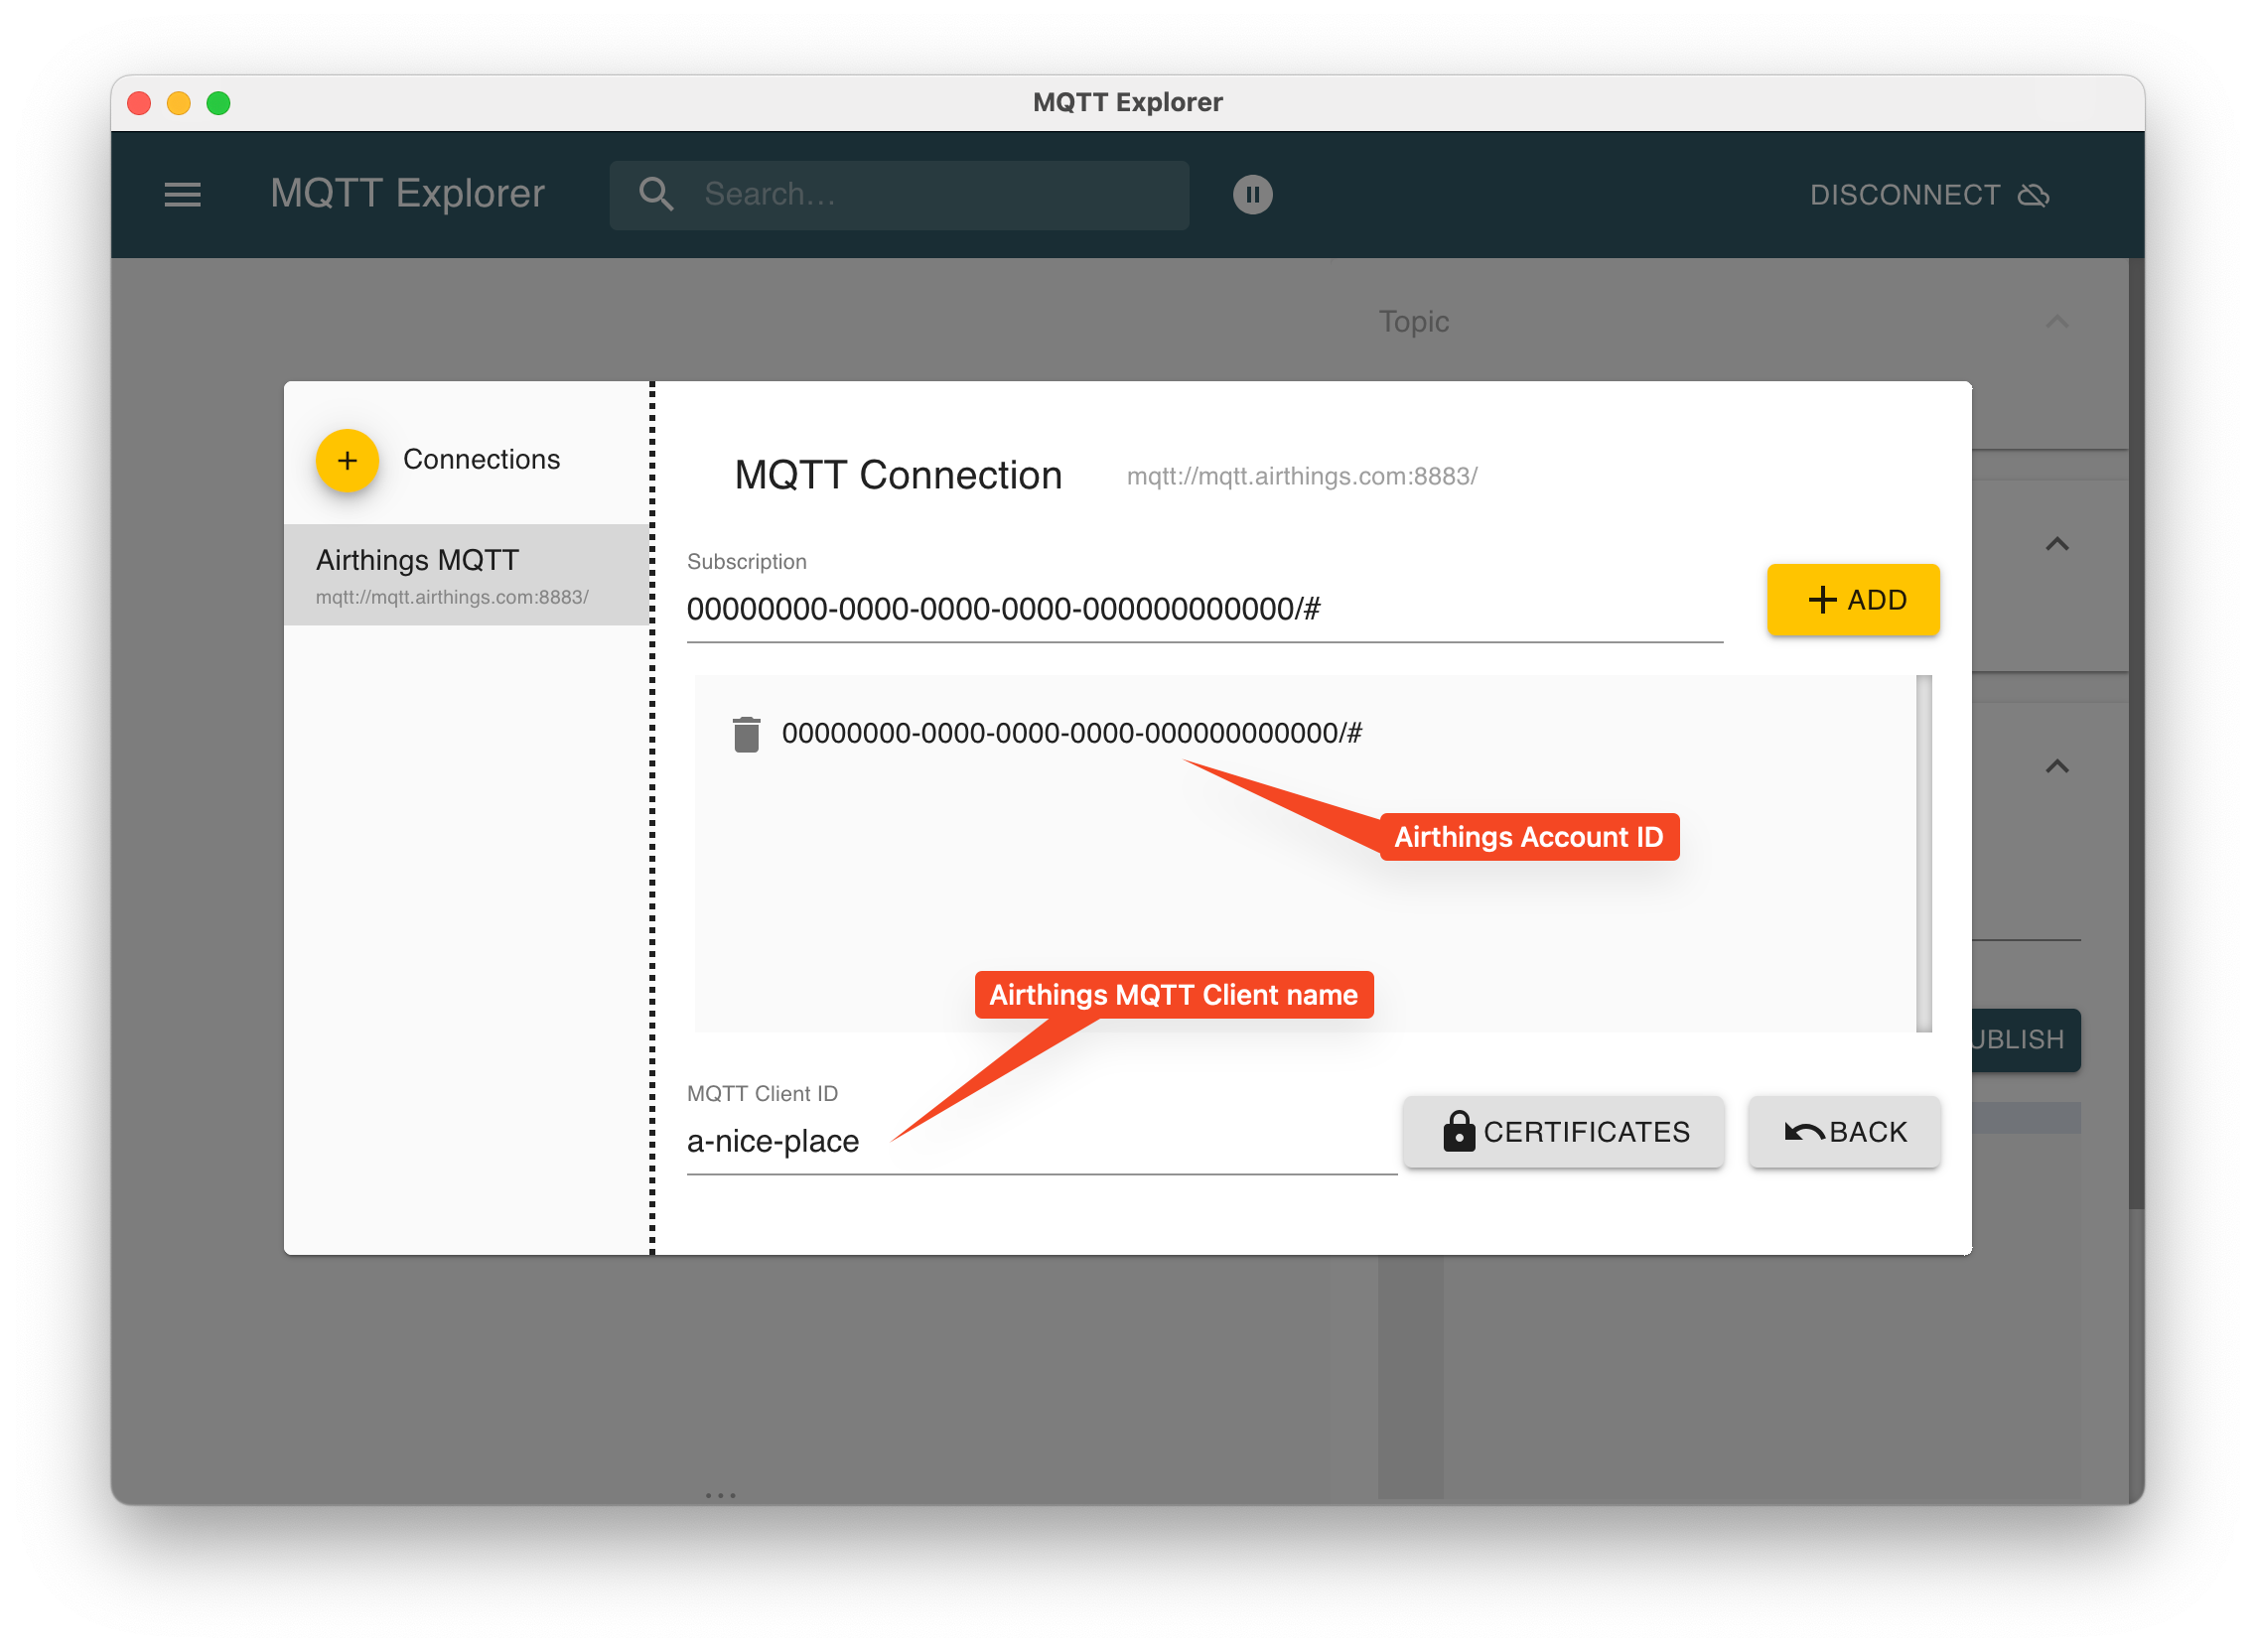
| Client ID | Airthings MQTT client ID, e.g. 00000000-0000-0000-0000-0000000000 |
| MQTT Client name | Airthings MQTT client name, e.g. a-nice-place |
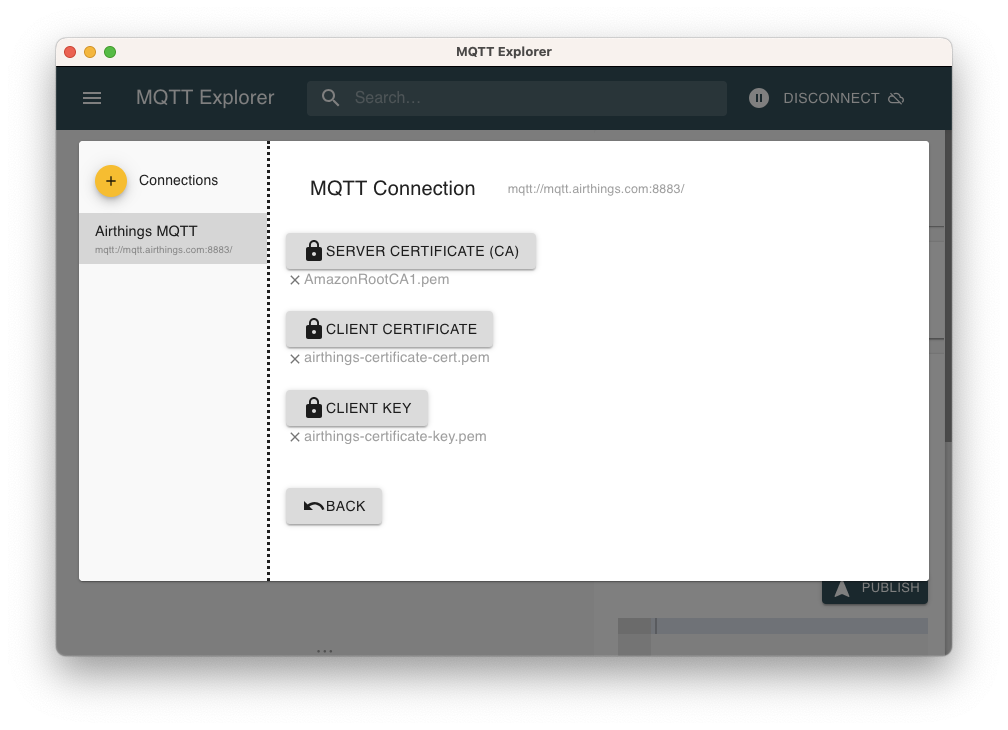
| CA File | Download this file |
| Certificate File | Use -cert.pem you downloaded/uploaded from/to Airthings dashboard |
| Key File | Use -key.pem you downloaded/uploaded from/to Airthings dashboard |
Note: Airthings MQTT does not use
usernameandpassword
Here is an example using MQTT explorer:
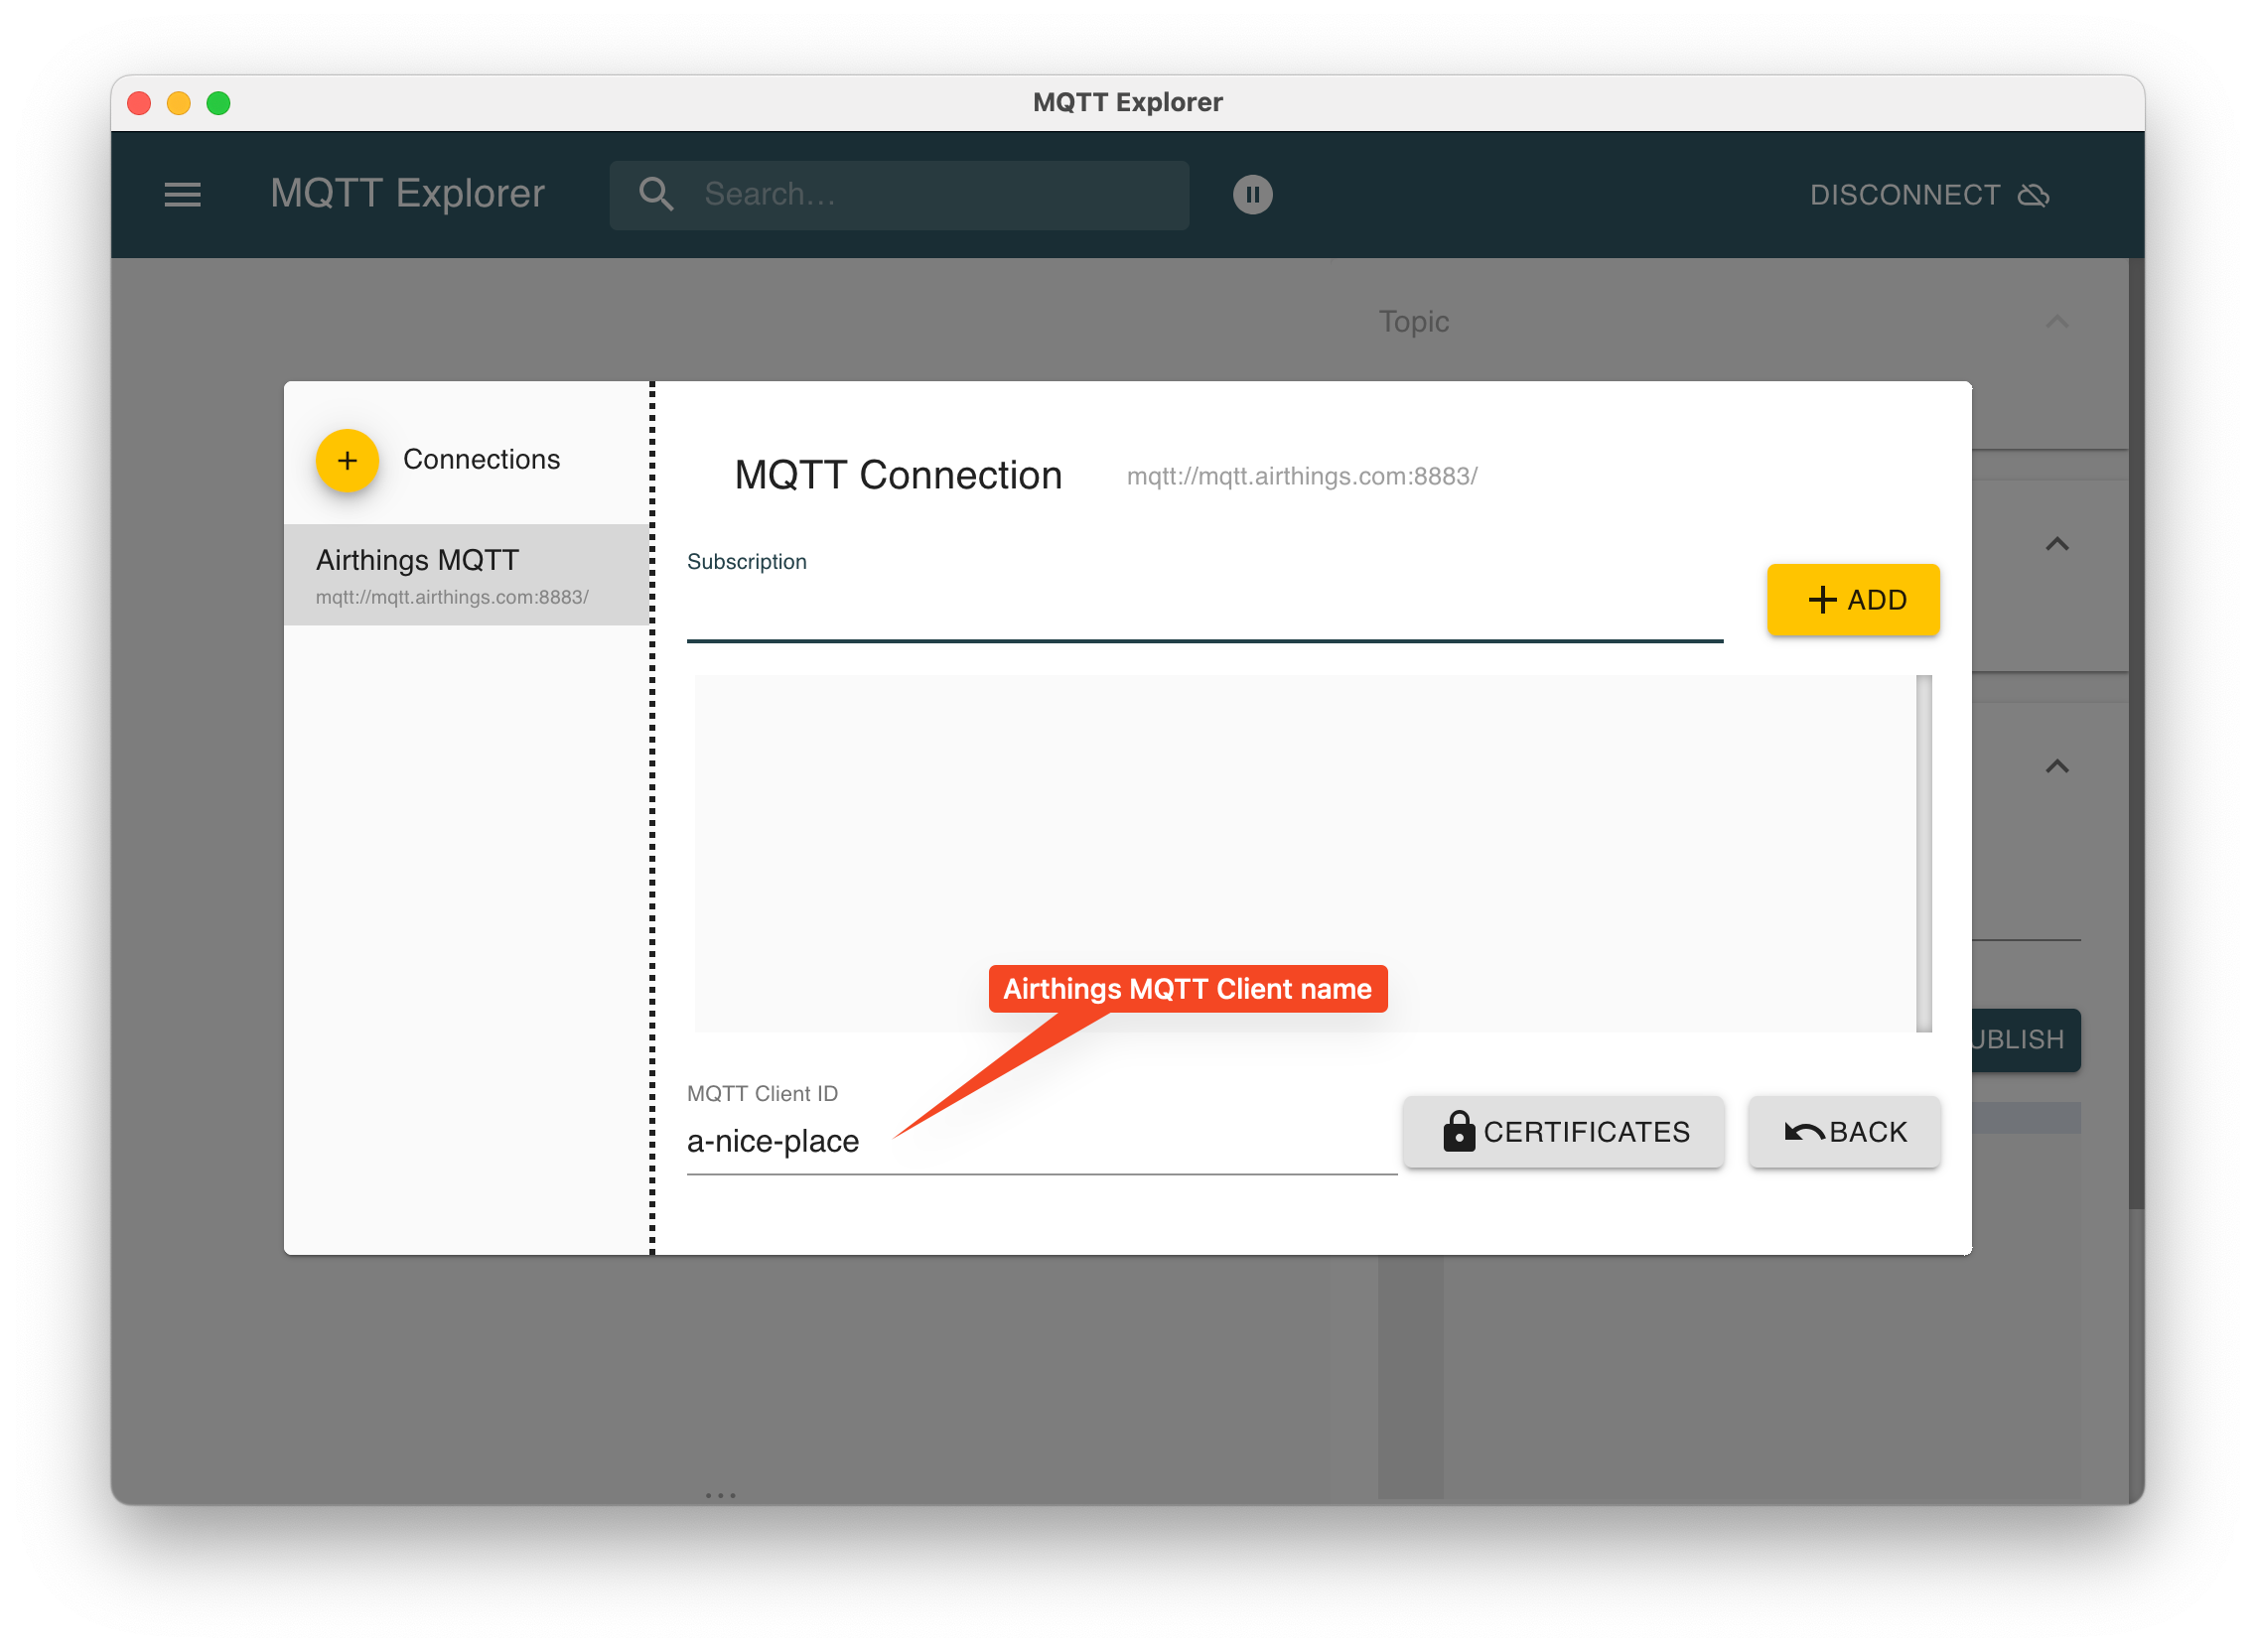
Subscribe to Device Data
A wildcard-subscription can be made to the topic {accountId}/# to receive the first samples via MQTT.
See Topics to read more about all available topics.
Here is an example of a subscription to data from all accessible locations in the account using MQTT explorer:

Updated 4 months ago