MQTT Bridge
Set up an MQTT bridge to parse data to your offline devices
Accessing data from Airthings' MQTT broker securely requires a simple setup for most clients, but there are some devices and software that can struggle with either establishing a TLS connection or accessing JSON formatted data. You might also want to keep some devices on a separate local network without Internet access for security reasons, making it impossible for them to reach the Airthings MQTT broker.
For cases like these, there is a simple solution - add a device to your network that acts as an MQTT bridge for devices on the local network(s) to connect to instead of connecting securely to the Airthings MQTT broker.
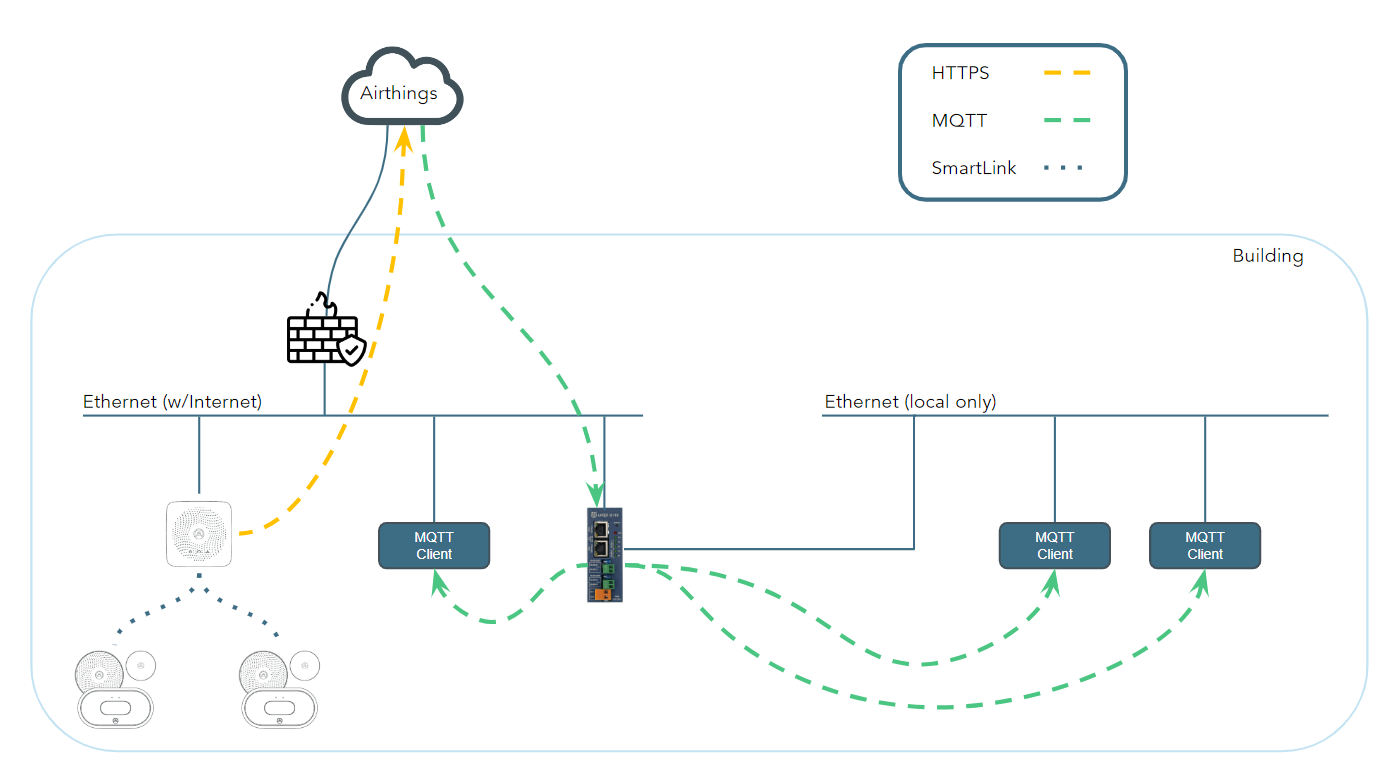
Using a device like the Unipi Gate with Node-RED for this purpose offers you complete flexibility in how you share the Airthings data locally.
This guide will explain how to configure the Unipi Gate device, but if you’d rather use another device running Node-RED, feel free to skip the Unipi configuration part of the guide and import this flow on your Node-RED instance instead (you’ll have to install the Aedes MQTT broker to your Node-RED instance before importing the flow).
Requirements
To get this solution up and running, you will need the following:
- An active Airthings for Business account with sensor-devices registered to it
- Unipi Gate G100 or G110 (or any other device running Node-RED)
- An Ethernet network with Internet connection
Airthings MQTT configuration
You will have to set up an MQTT integration in the Airthings for Business Dashboard first. Please sign in to dashboard.airthings.com with your admin user, and navigate to the MQTT section of the Integrations page:
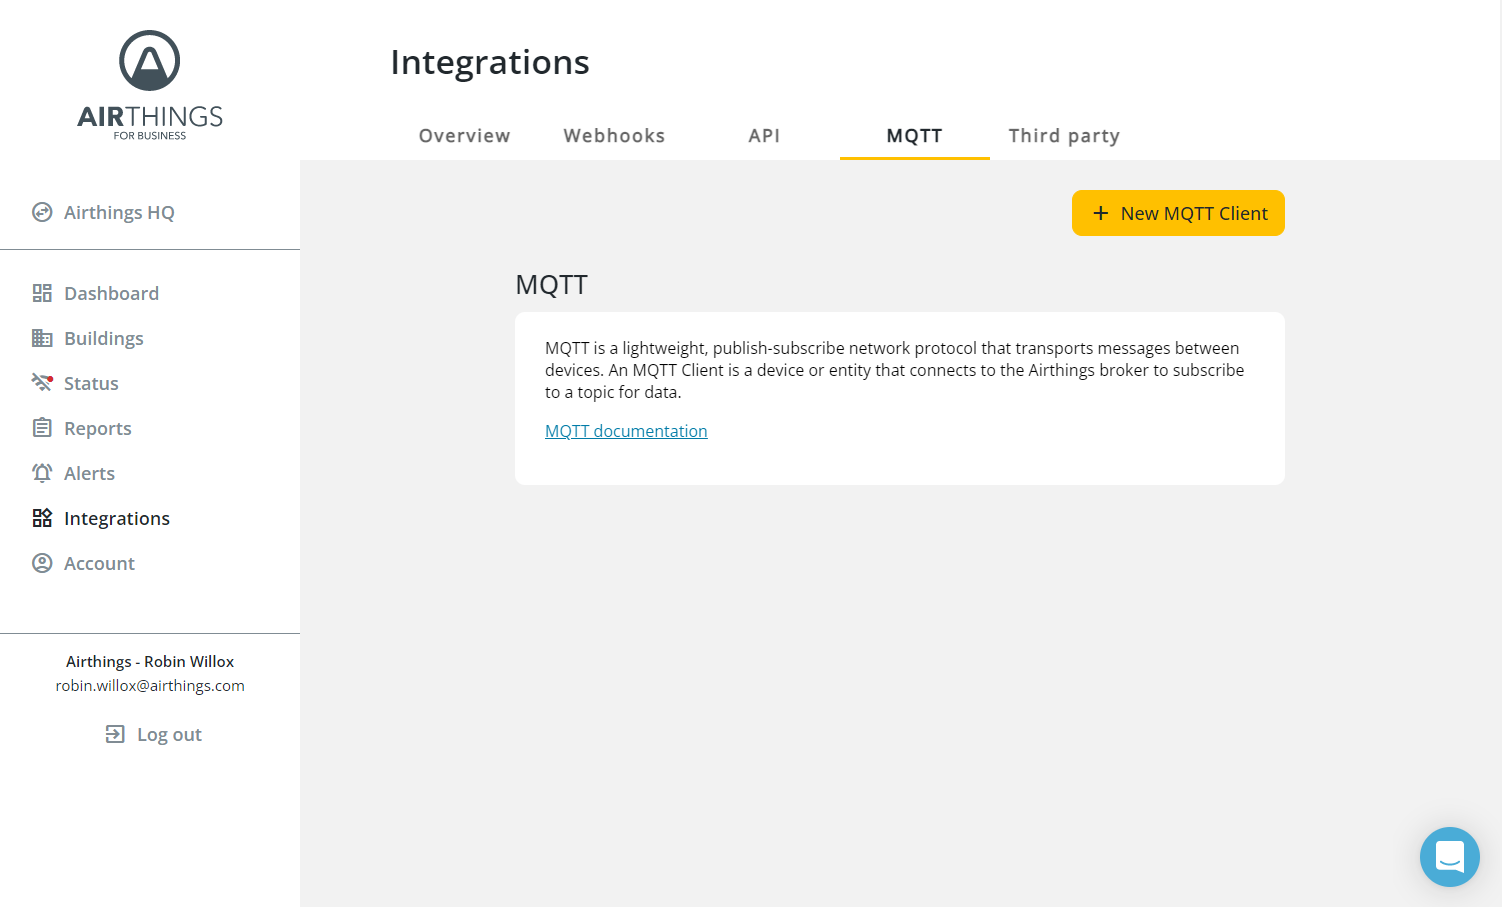
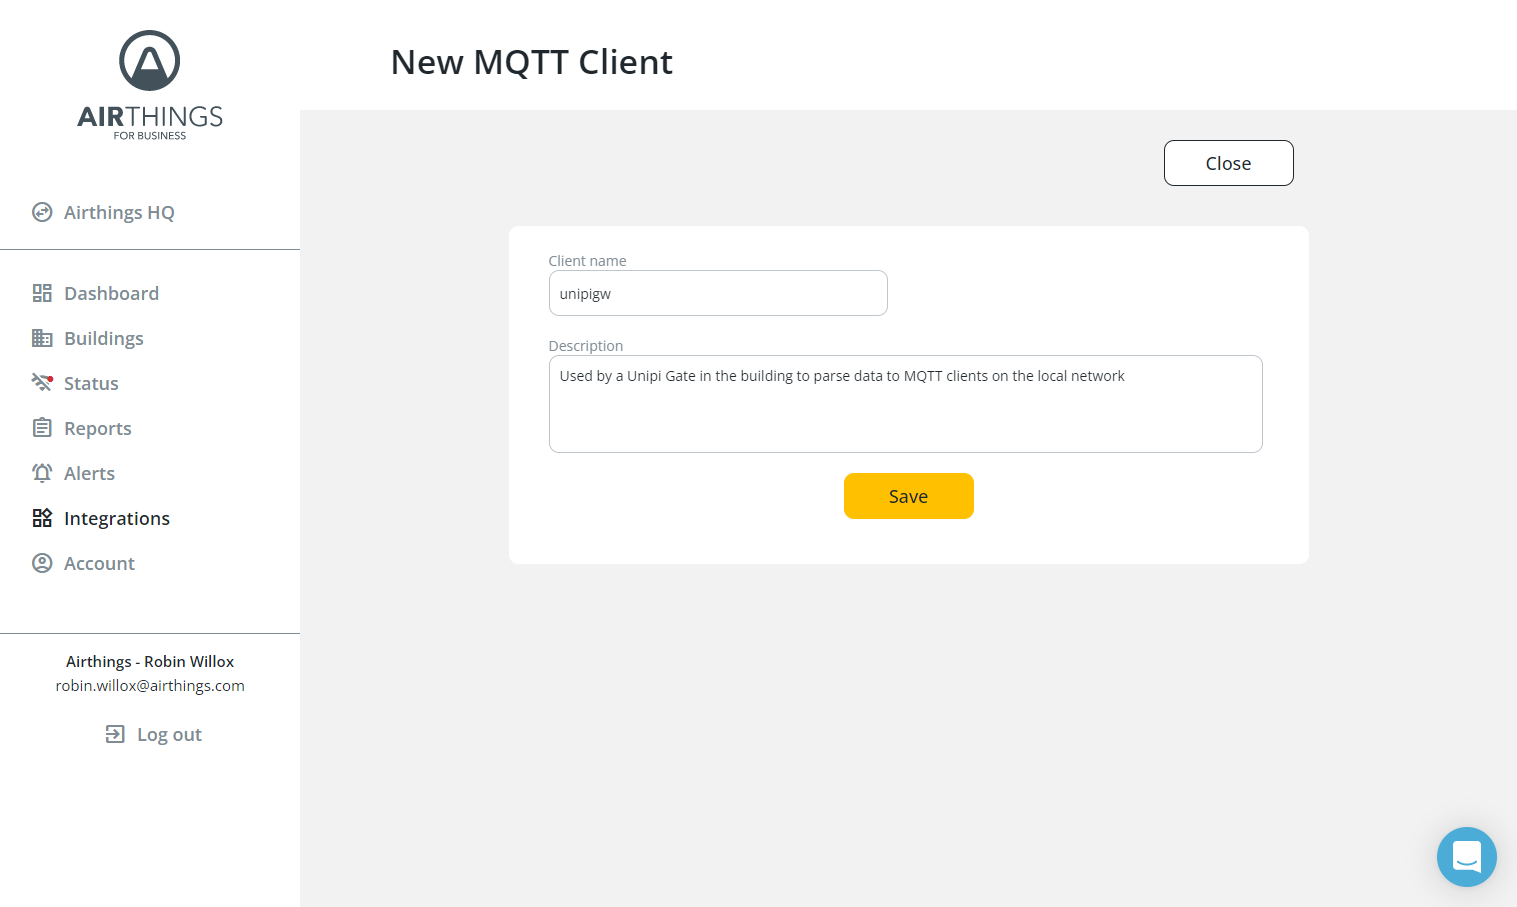
Click on the New MQTT Client button to add a new MQTT connection for the Unipi Gate to use, and give it a name before saving the client:
Click on the Download certificate button to download the certificates that will be used by the Unipi Gate device to authenticate with the MQTT broker:
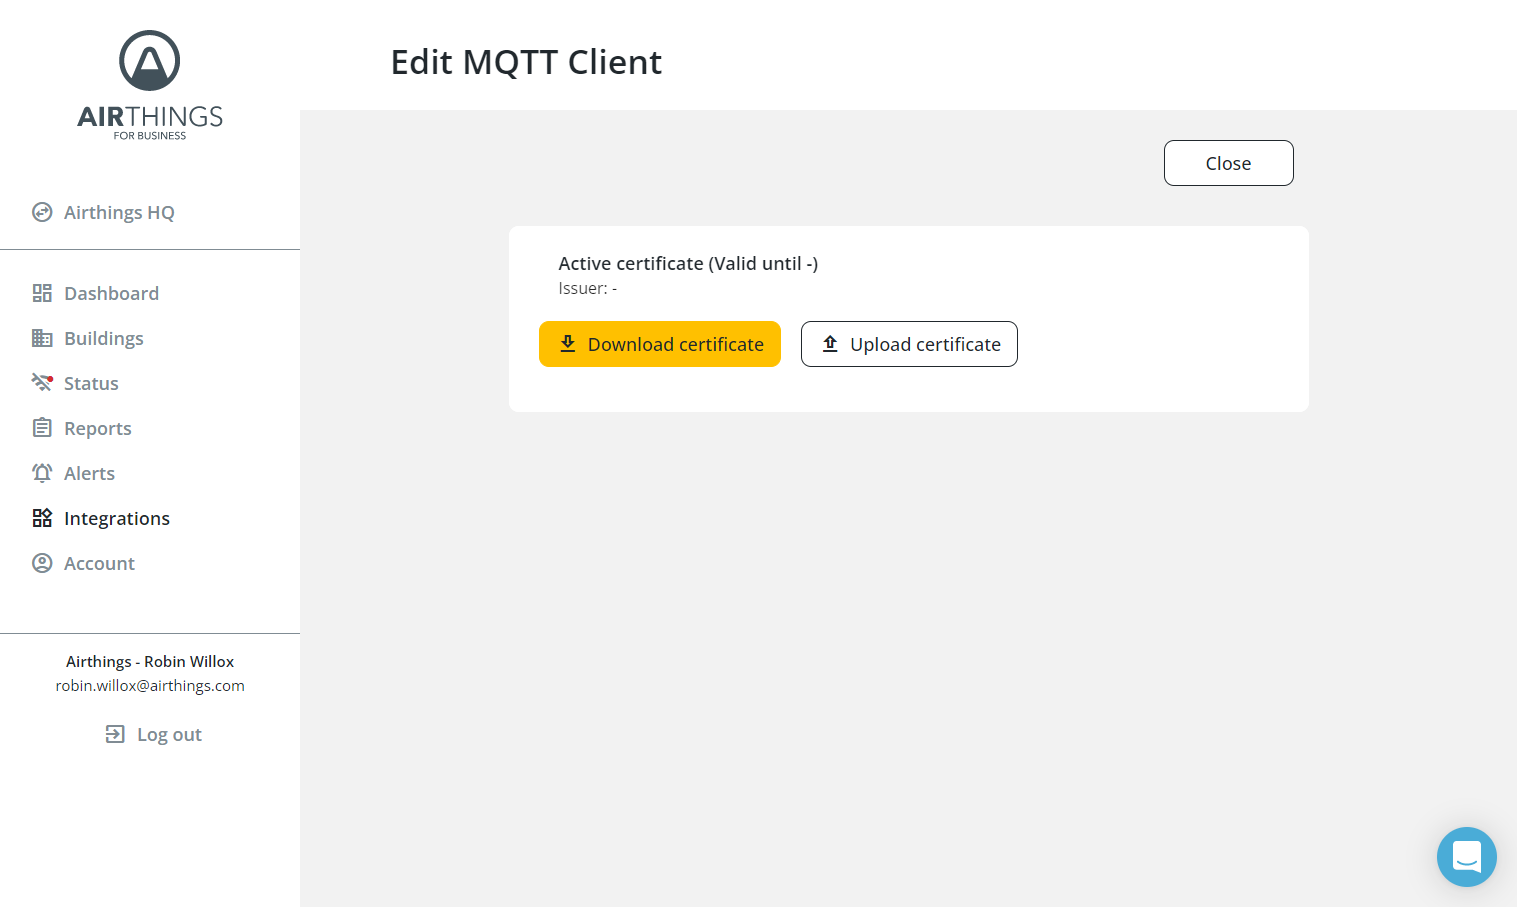
Keep the downloaded certificates for later, and do not use the certificates to connect any other client to the MQTT broker, as the certificates can only be used by one client.
Once the client is created, select the building it will access data from, activate it by toggling Enable on, and save the client:
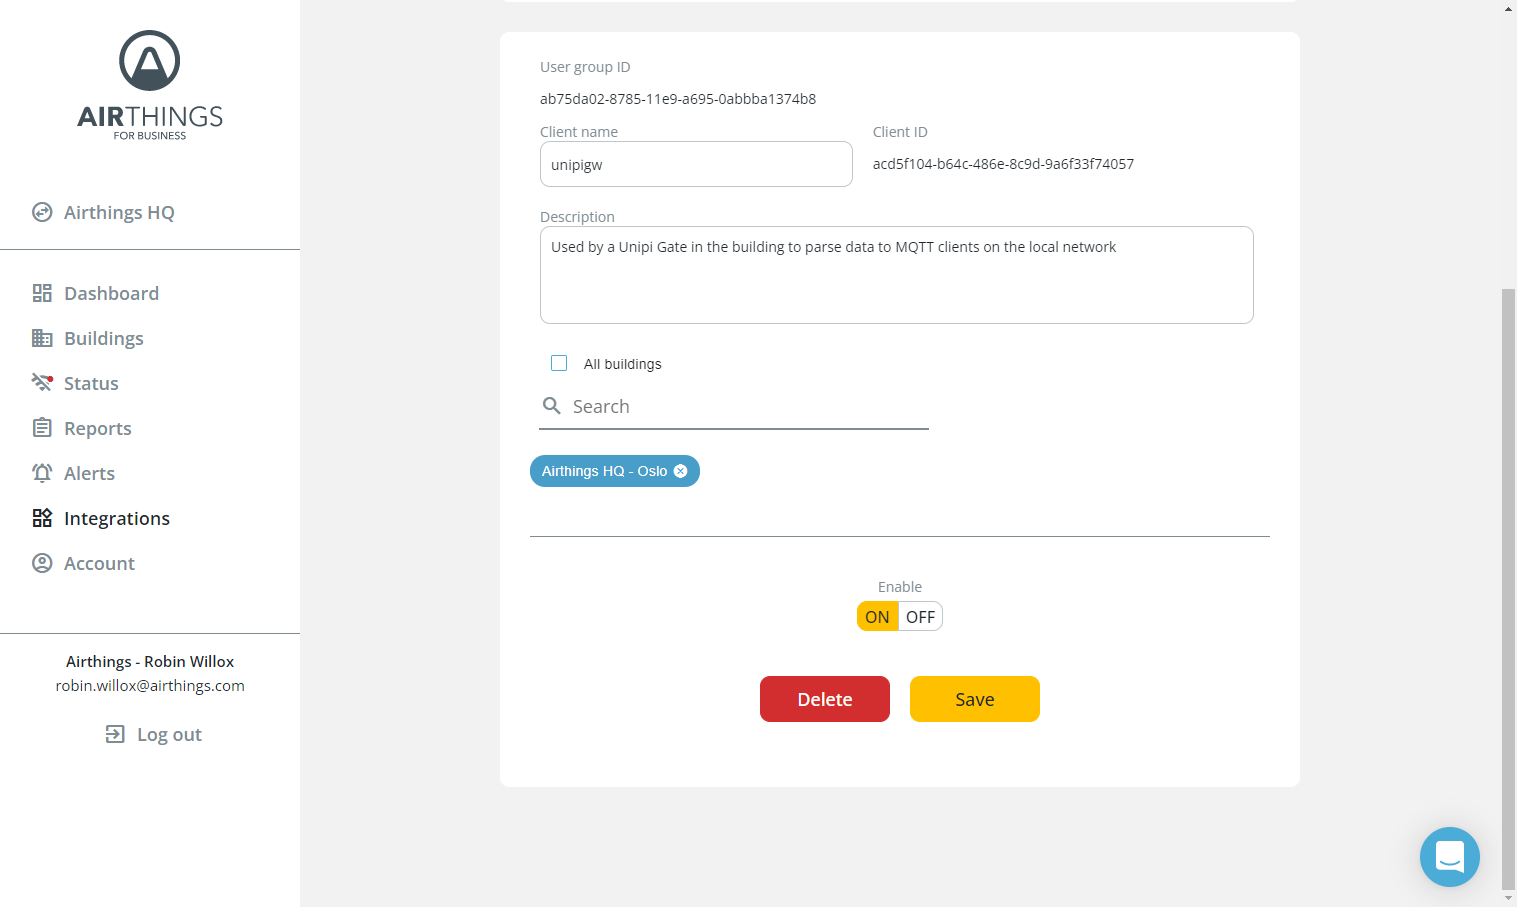
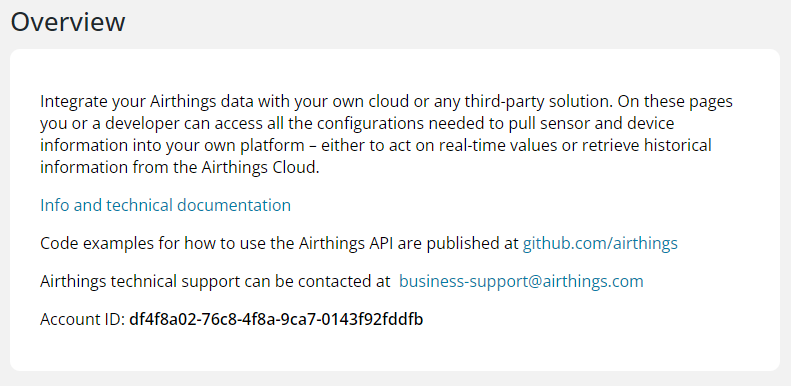
Note that the “Account ID” and the “Client ID" will be used later when connecting the Unipi Gate device, so you should store those in case you don’t have access to the Dashboard anymore when configuring the Unipi Gate device. The account ID can be found in the Integrations part of the Dashboard, under the "Overview" tab:
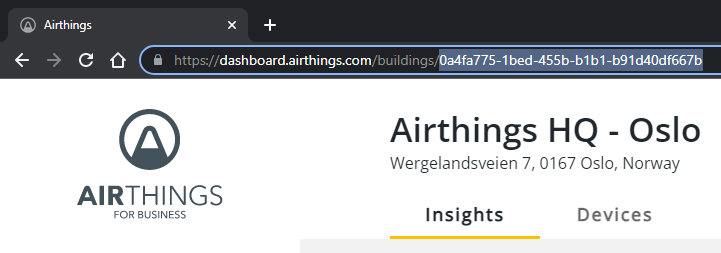
You should also store the “Building ID” which can either be found by navigating to the Buildings page in the Dashboard and clicking on the building you selected in the MQTT client configuration. The “Building ID” will then be available in the address-field of your web-browser:
Both account ID and location ID can alternatively be requested from the API if that is preferable.
Unipi configuration
Once the MQTT integration has been configured in the Dashboard, you are ready to set up the Unipi Gate device. The device is pre-configured with the Node-RED software that we’ll use for the configuration, but we’ve prepared an image that contains the configuration required. Click here to download the image.
Flash the device with custom image
To install this image, please follow these steps:
-
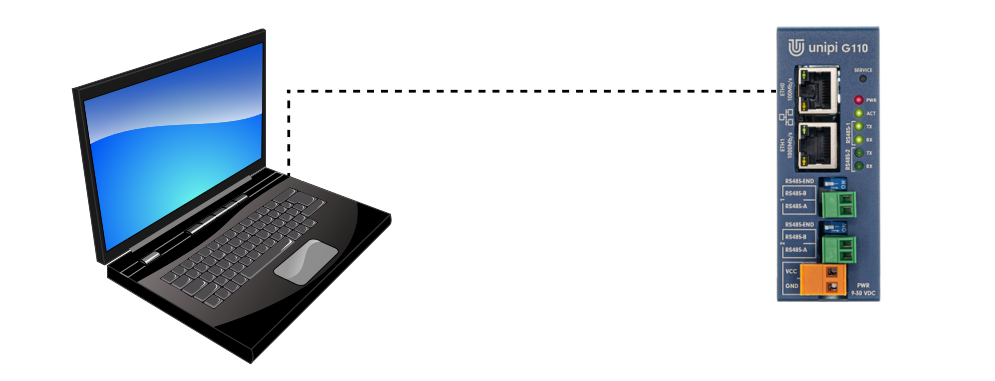
Connect the device to your PC with a network cable (RJ45)
-
Press and hold the SERVICE button
-
Plug in the device's power supply. After a moment the Unipi Gate will switch to service mode indicated by slow flashing of ACT, RX and TX LEDs
-
You can now release the SERVICE button
-
Set the IP address of your PC to
192.168.200.100 -
Connect to http://192.168.200.200/ in your web browser to open the device setting page
-
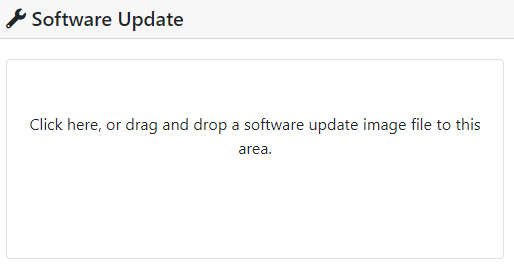
Drag and drop archive.swu from the zip-file you previously downloaded to the software update location of the device web-page:
-
Wait until the device has finished installing the image, and it will reboot into normal operation
Configure IP address
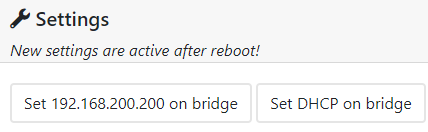
The Ethernet ports on the device are by default set to bridge mode - meaning they will act as a switch if both ports are used. The device is configured to automatically receive an IP address from a DHCP server, but if you want to set the IP address to 192.168.200.200, re-enter service mode (step 1-6 from the previous section) and click Set 192.168.200.200 on bridge before rebooting the device:
Once your computer is on the same network as the device, you can follow these steps to configure the IP address of the Ethernet ports:
-
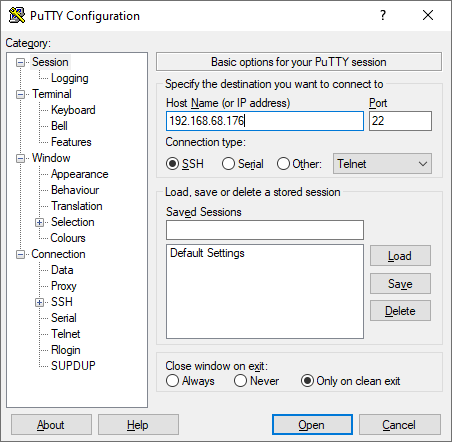
Open a connection to the device’s IP address using an SSH client like PuTTY:
-
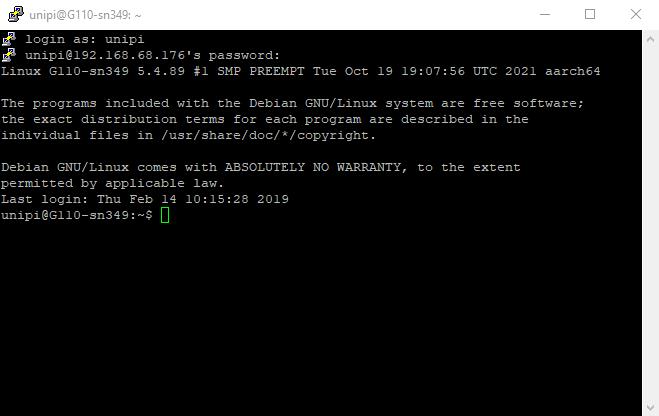
The default username is: unipi and password is: unipi.technology:
-
Based on the network(s) you are connecting the device to, chose one of the following configurations and edit the settings to match your network settings:
-
If you want to keep the bridged connection and enter a specific IP address, open the bridge
br0by running the commandsudo nano /etc/network/interfaces.d/br0-
In the Nano editor, modify the text to something like this:
auto br0
iface br0 inet static
  bridge_ports eth0 eth1
    address 192.168.200.150
    netmask 255.255.255.0
This will set the IP address to
192.168.200.150leaving the ports in bridged mode -
Save the file using
ctrl+o, exit the editor usingctrl+xand reboot the device by running the commandsudo rebootto apply the changes.
-
-
If you want to configure the two ports individually, first remove the bridge by running the following command
sudo rm /etc/network/interfaces.d/br0-
Run the command
sudo nano /etc/network/interfaces.d/eth0orsudo nano /etc/network/interfaces.d/eth1to configure eithereth0oreth1interfaces. -
Configure either a static IP address like this:
allow-hotplug eth1
iface eth1 inet static
  address 192.168.25.51
  netmask 255.255.255.0
or a dynamic IP address like this:
allow-hotplug eth0 iface eth0 inet dhcp -
Save the file using
ctrl+o, exit the editor usingctrl+xand reboot the device by running the commandsudo rebootto apply the changes.
-
-
Node-RED configuration
Enter the Node RED configuration by opening the device using port 1880: http://{device_IP_address}:1880
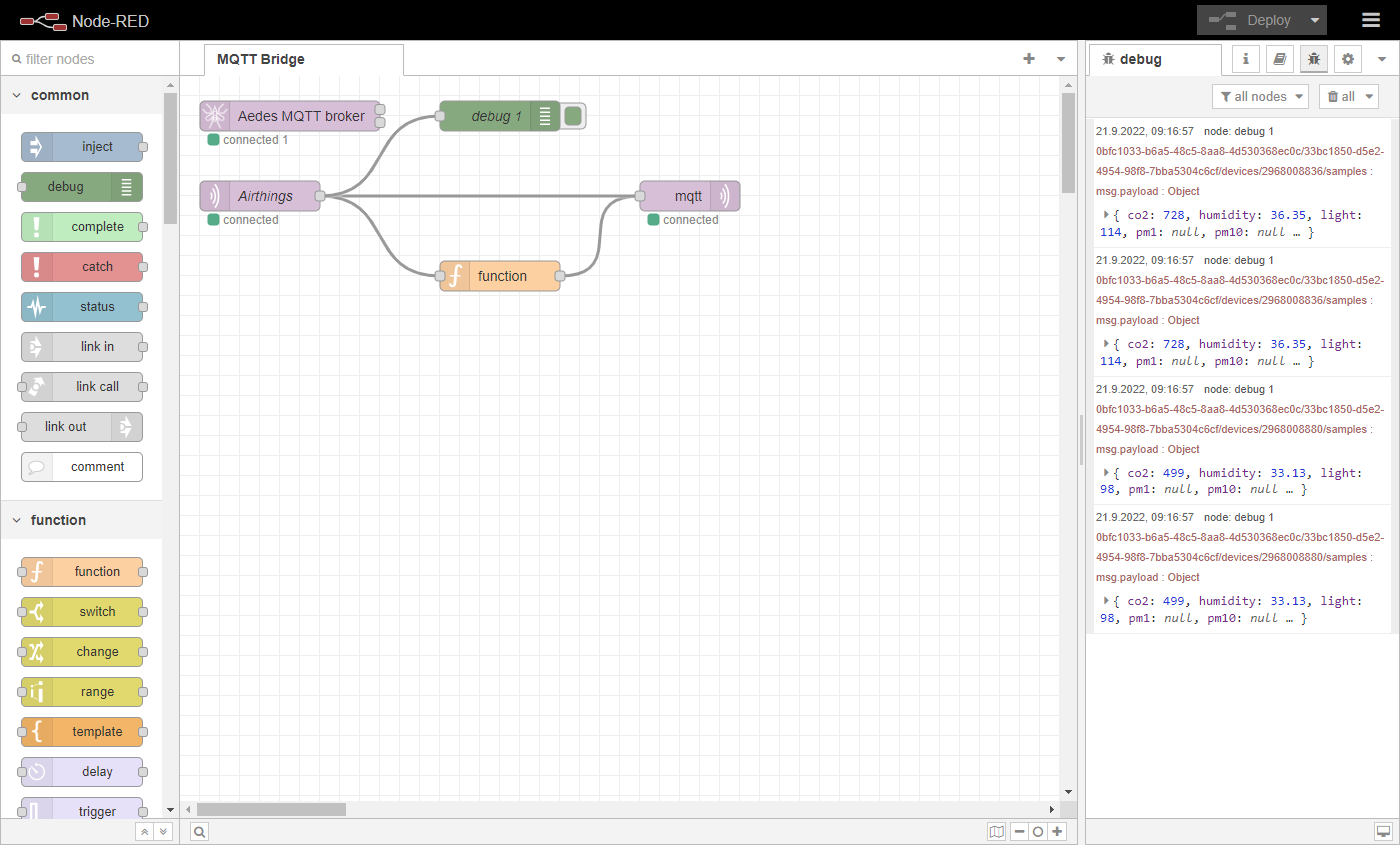
You will then see the flow configured in the image previously used while flashing the Unipi device:
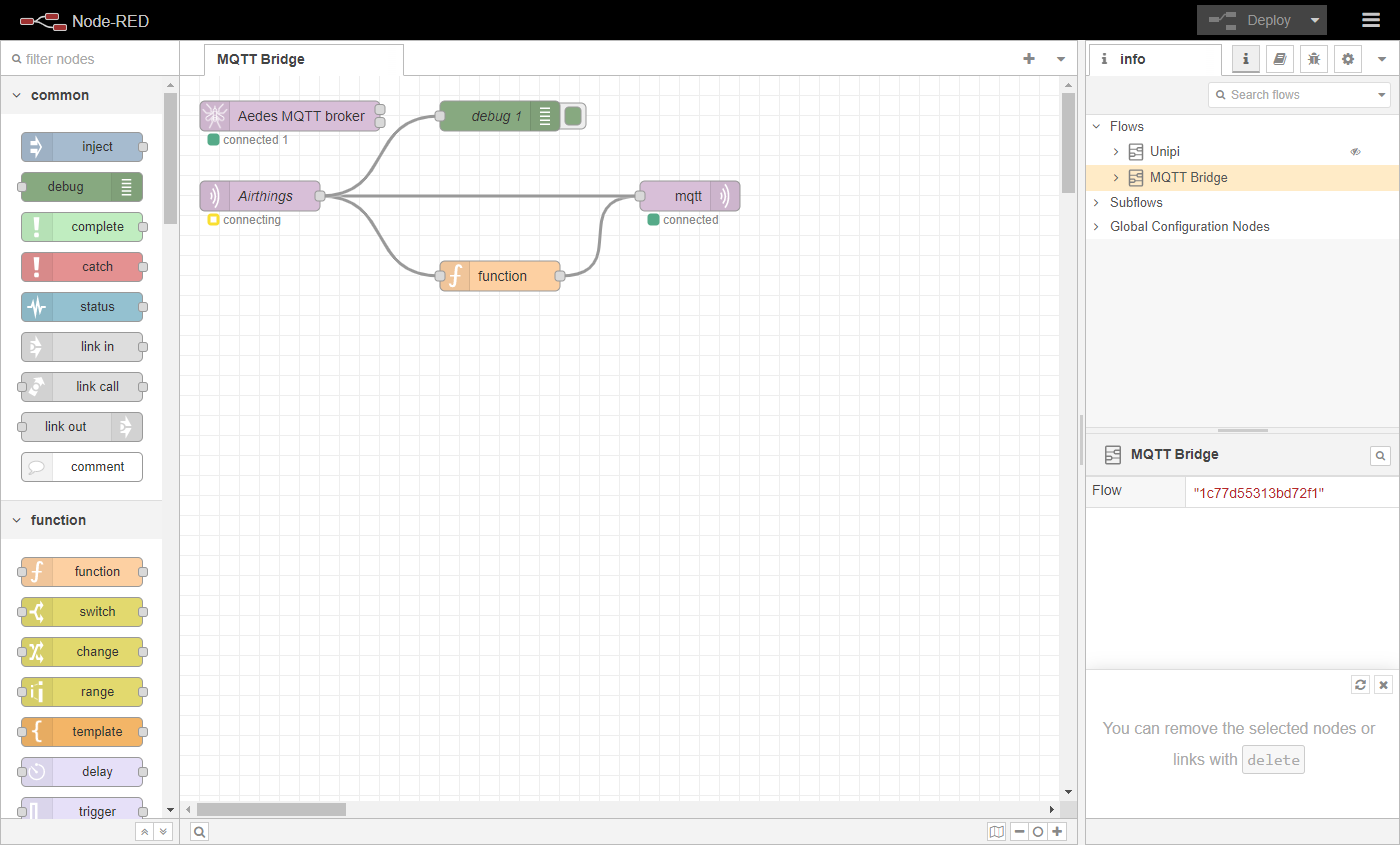
The only thing you need to do in the Node-RED flow is to configure the connection to the Airthings MQTT broker. To do this, double click the Airthings node and enter the correct topic in the Topic field:
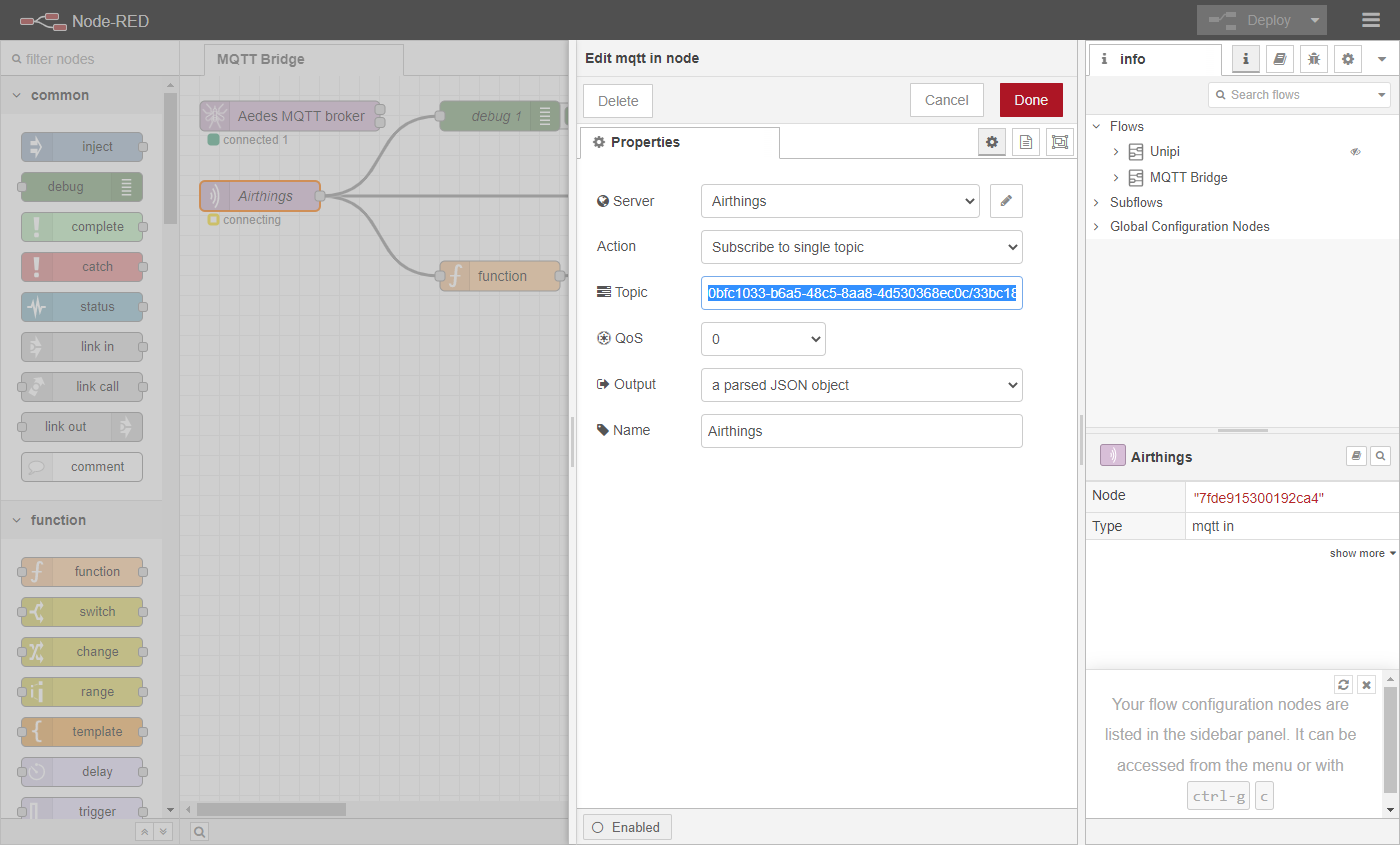
The format of the topic is {accountId}/{locationId}/# and can look like this: 0bfc1033-b6a5-48c5-8aa8-4d530368ec0c/33bc1850-d5e2-4954-98f8-7bba5304c6cf/#
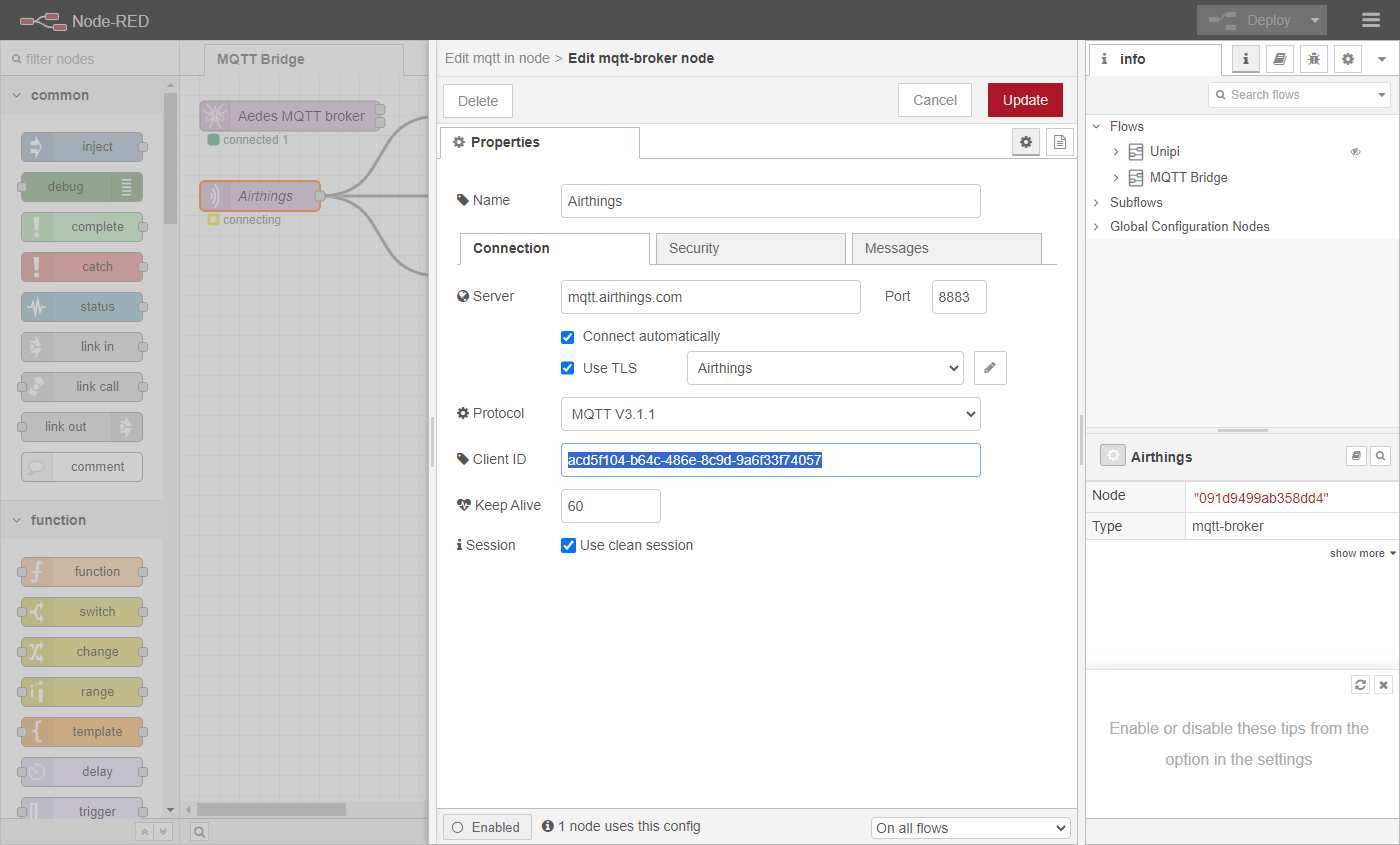
When the topic has been added, click on the pencil-button next to the “Airthings” server to start configuring the authentication, and enter the ID of the MQTT client added in the Airthings for Business Dashboard in the Client ID field:
When the client ID has been added, click on the pencil-button next to the “Airthings” TLS configuration to upload the certificates that was downloaded when the MQTT client was created in the Airthings for Business Dashboard:
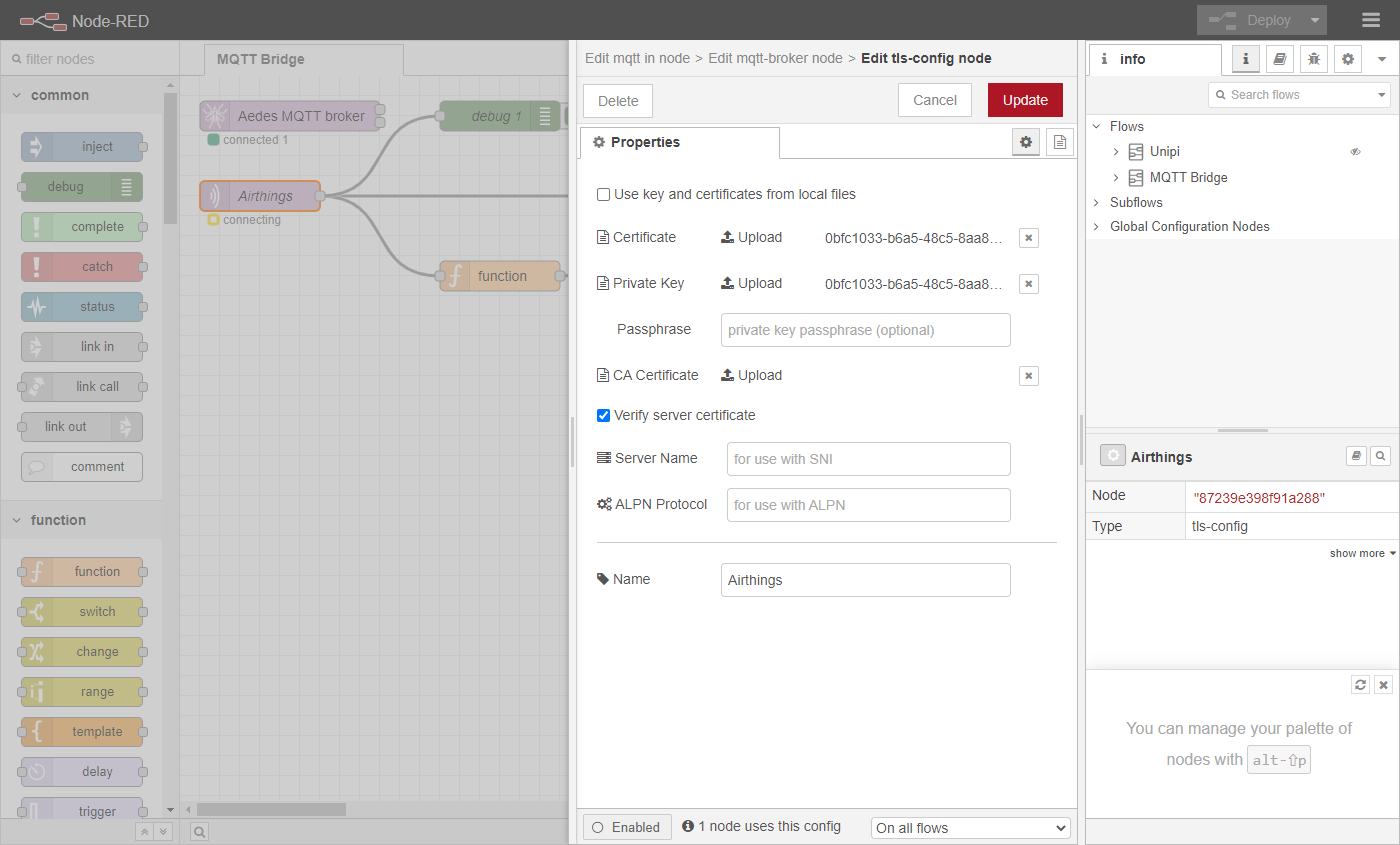
The CA Certificate can also be uploaded, but this shouldn’t be necessary.
Complete the setup by clicking the Update button in the top right corner, closing and applying all settings, and clicking Deploy in the top right corner. The flow will now show a connected status on all nodes, and you should be able to see data coming in when the devices transmits their sensor values if the debug window to the right is selected, and the debug node is active:
Testing the MQTT broker with MQTT Explorer
The MQTT broker running on the Unipi Gate can be any clients on the same network, and a great way to check that the data is arriving from the Airthings for Business devices is to connect using MQTT Explorer.
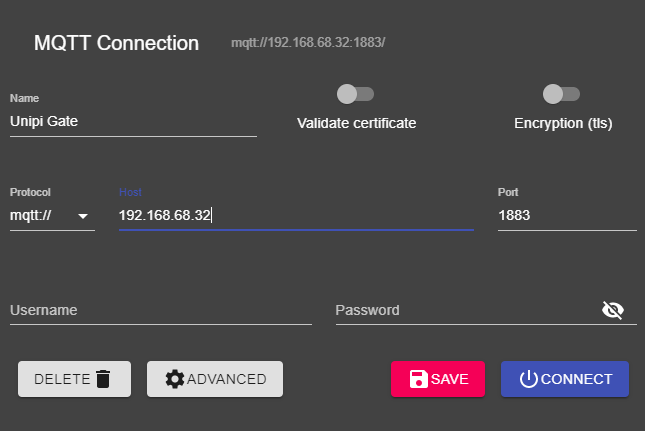
To do this, simply install the software and connect your computer to the same network as the Unipi Gate. Enter the IP address of the Unipi Gate device in the configuration and click connect (all other default settings can be kept):
You can now view all the available topics in a navigation tree, and click on each topic to view the data:
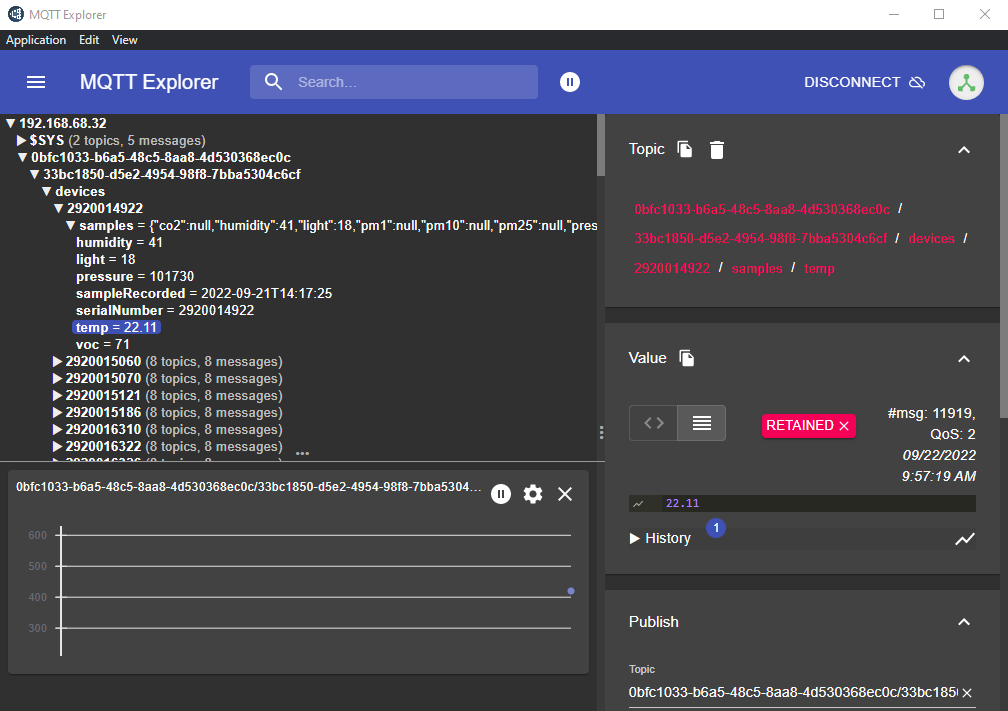
Click on the “copy” button next to the selected topic to copy the topic string - this can then be pasted to the configuration of other clients to make it easier to add the different available topics in case the client software is unable to browse the data from the broker in a simple way.
Updated over 1 year ago