Weble BACnet Gateway
Provide Airthings data to BACnet/IP clients by automatically creating BACnet objects for sensor values
Providing sensor-data from Airthings devices from a BACnet/IP server can be achieved in multiple ways, but using a Weble WBox G110 gateway for this purpose is as simple as it gets. We’ve worked together with Weble to create a dynamic routing which automatically adds BACnet objects based on available devices and sensors in your Airthings for Business account. All you need to do is follow the simple steps in this guide - which will have you up and running in no time.
Requirements
Here’s what you need to get the system up and running:
- An active Airthings for Business account with sensor-devices registered to it.
- Weble WBox G110 with the following licenses:
- An Ethernet network with Internet connection, or a USB 3G/4G modem
- An Ethernet network with BACnet IP client device(s) (this can be the same network as the one with Internet connection, or a separate one)
Solution overview
The setup utilizes the Airthings for Business MQTT service to receive sensor data. The gateway creates one BACnet Analog Input object for each sensor in every Airthings device available to it, and it updates the present value of these object every time new data is received.
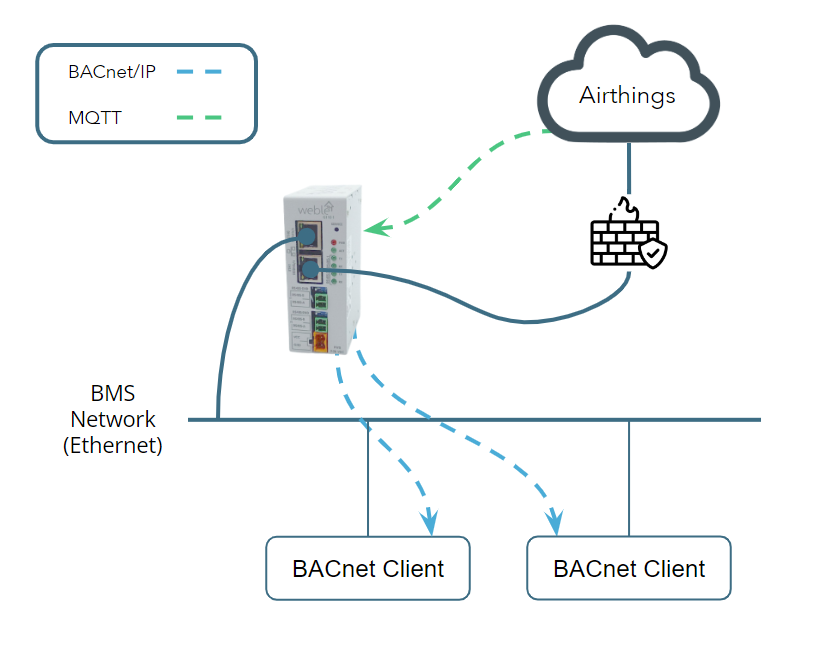
If a sensor-device is removed from the Airthings account, the gateway will stop receiving data from the device, and the BACnet objects can be removed manually if needed. If a new device is added to the account, new BACnet objects will automatically be created for that device as long as the MQTT subscription is correctly configured using wildcard (#).
A detailed technical overview of the device configuration can be accessed from Weble here.
MQTT Configuration
First of all, an MQTT client will have to be added to the Airthings for Business account. Please follow the steps in Getting Started with Airthings MQTT to create the client. If you only want the device to receive data from the building where it is installed, you should only select this building when creating the client. This can be changed later if you should change your mind.
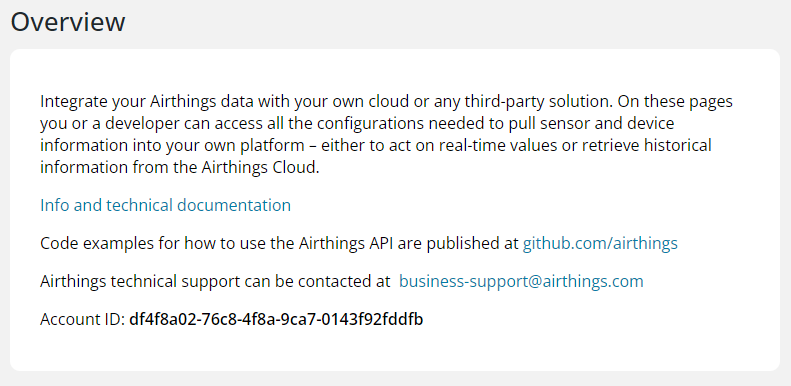
Note that the “Account ID” and the “MQTT Client ID” will be used later when configuring the gateway device, so you should store those in case you don’t have access to the Dashboard anymore when configuring the it. The account ID can be found in the Integrations part of the Dashboard, under the "Overview" tab:
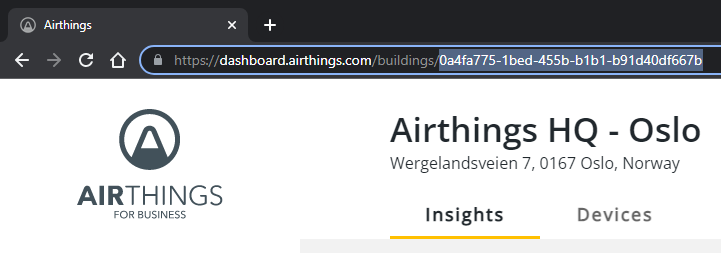
You should also store the ID of the building (Location ID) which can be found by navigating to the Buildings page in the Dashboard and clicking on the building you selected in the MQTT client configuration. The “Location ID” will then be available in the address-field of your web-browser:
Both account ID and location ID can alternatively be requested from the API if that is preferable.
Weble WBox G110 Setup
After installing and powering the device by following Weble’s installation instructions, either connect to eth0 on 192.168.1.99 or eth1 which is configured to receive an IP from a DHCP server. Open the device's IP in your preferred web-browser to access the configuration page (default username and password is admin).
Network settings
If you want to change the network configuration before connecting the device to the appropriate networks, navigate to Network and expand Network configuration:
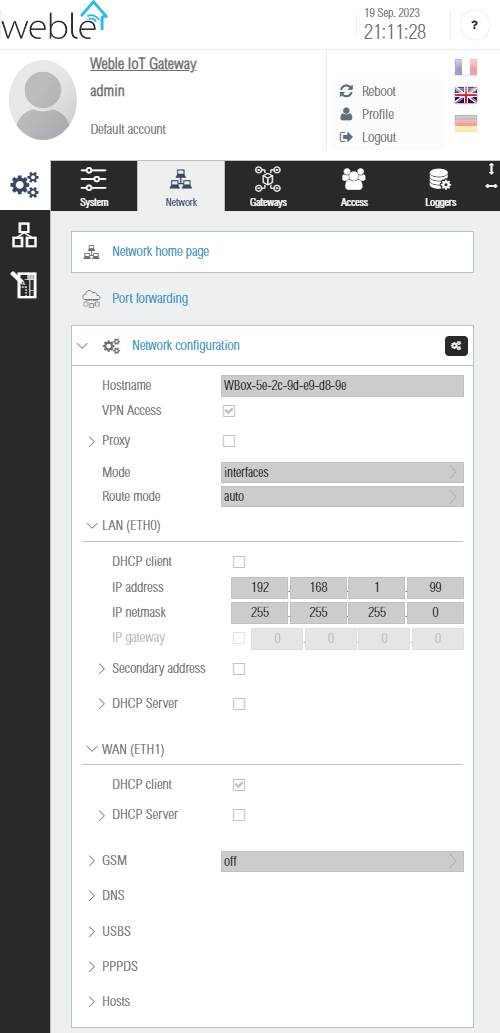
Click the settings button to enable editing the interfaces, and save when completed. Connect the device to the proper Ethernet networks and reconnect to the device.
(Optional) Add the device to your Weble account
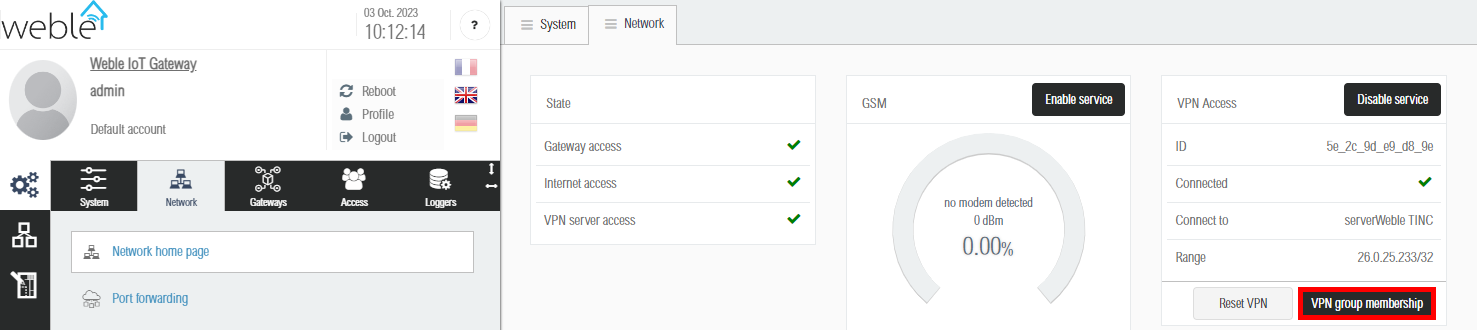
If you have purchased the “Remote Services” for your device, you should now configure your device to connect to your Weble account. From the “Network” tab in the menu, click Network home page to open the network dashboard. From the “VPN Access” card, click VPN group membership:
A dialog box will appear, asking you to provide email and password, so enter your Weble account credentials, and the device should appear shortly in your device overview if it is properly connected to the Internet.
Uploading the configuration
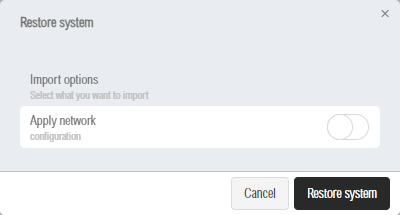
Download the template configuration, and then open the System-page (first page) of the Weble WBox G110. Click the Restore button in the top right corner to upload the configuration to the device:

Select the template configuration file, and click Restore system without enabling “Apply network configuration”, as that will set the network settings back to default.
Connecting to the MQTT broker
Navigate to the Gateways tab, expand/edit the MQTT configuration and add your MQTT client ID from the Airthings MQTT configuration to the “Client id” field:
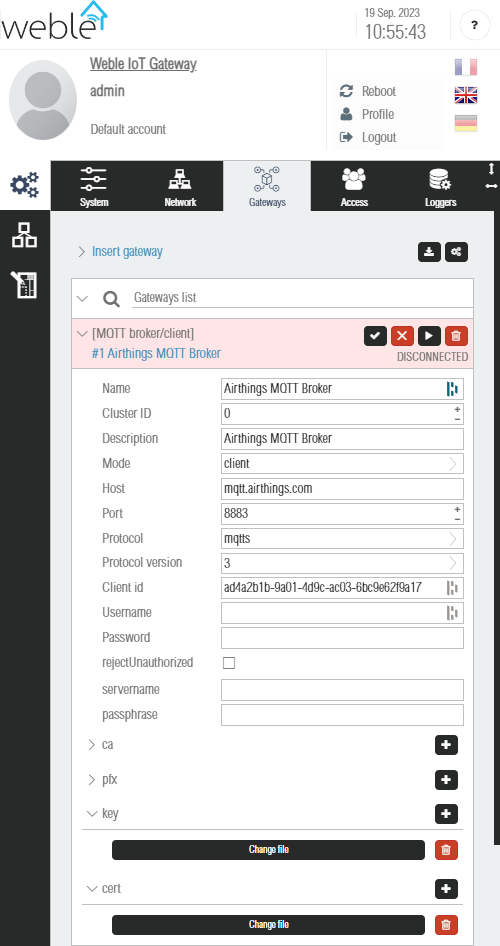
Click on the + next to the “key” and “cert” fields, and add the certificates downloaded when creating the MQTT client in the Airthings for Business Dashboard before saving the settings and starting the MQTT service.
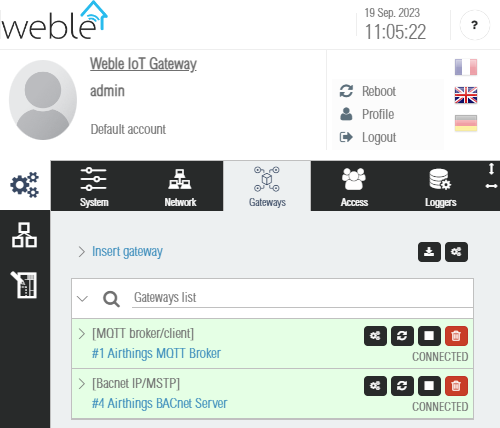
Confirm that the MQTT connection is established by identifying that the status of the gateway changed from “DISCONNECTED to “CONNECTED”.
Subscribing to MQTT data
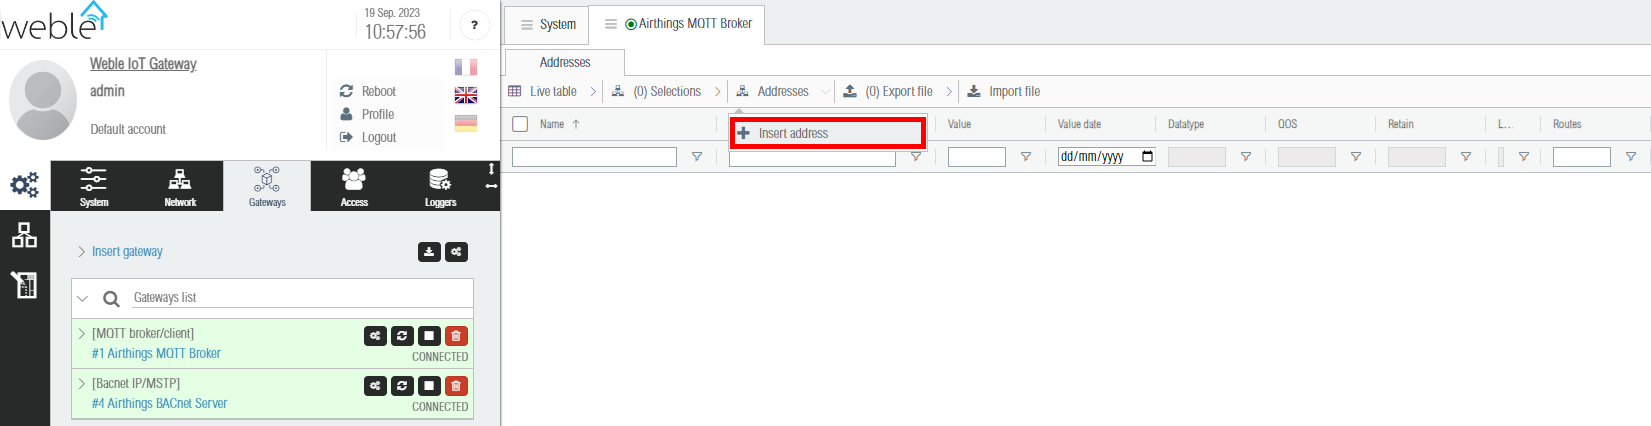
Click on the Airthings MQTT Broker to open the address overview, and click Addresses → Insert address:
In the dialog box that appears, add the MQTT topic you want to subscribe to in the “Name” field and click Save. If you want to get data from all the devices on the location (recommended), use a wildcard-subscription to {accountId}/{locationId}/#:
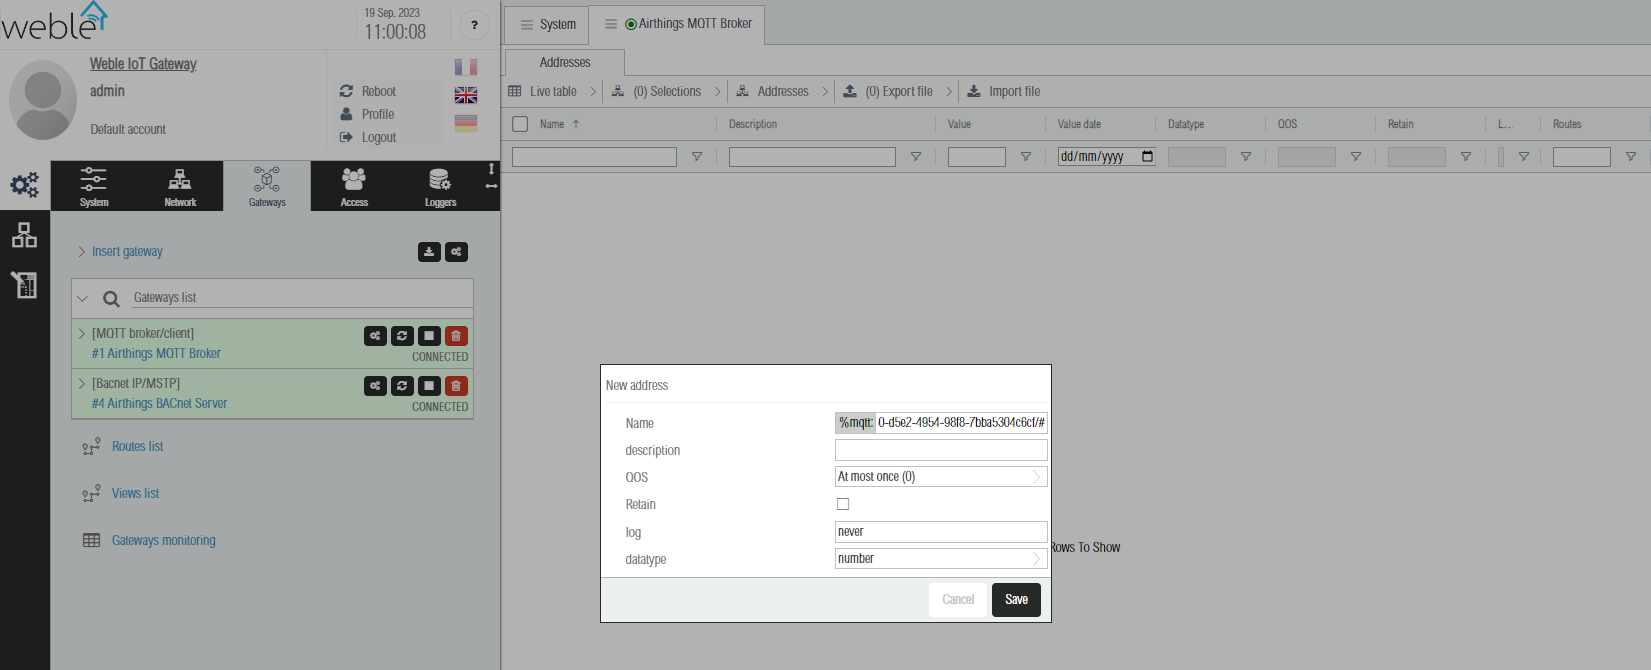
If you’d rather reduce the scope to specific devices, you can add multiple subscriptions to each specific device, i.e. {accountId}/{locationId}/devices/{serialNumber}/samples.
When the subscription is saved, data will be available in the address list as soon as it is received by the Airthings MQTT Broker:
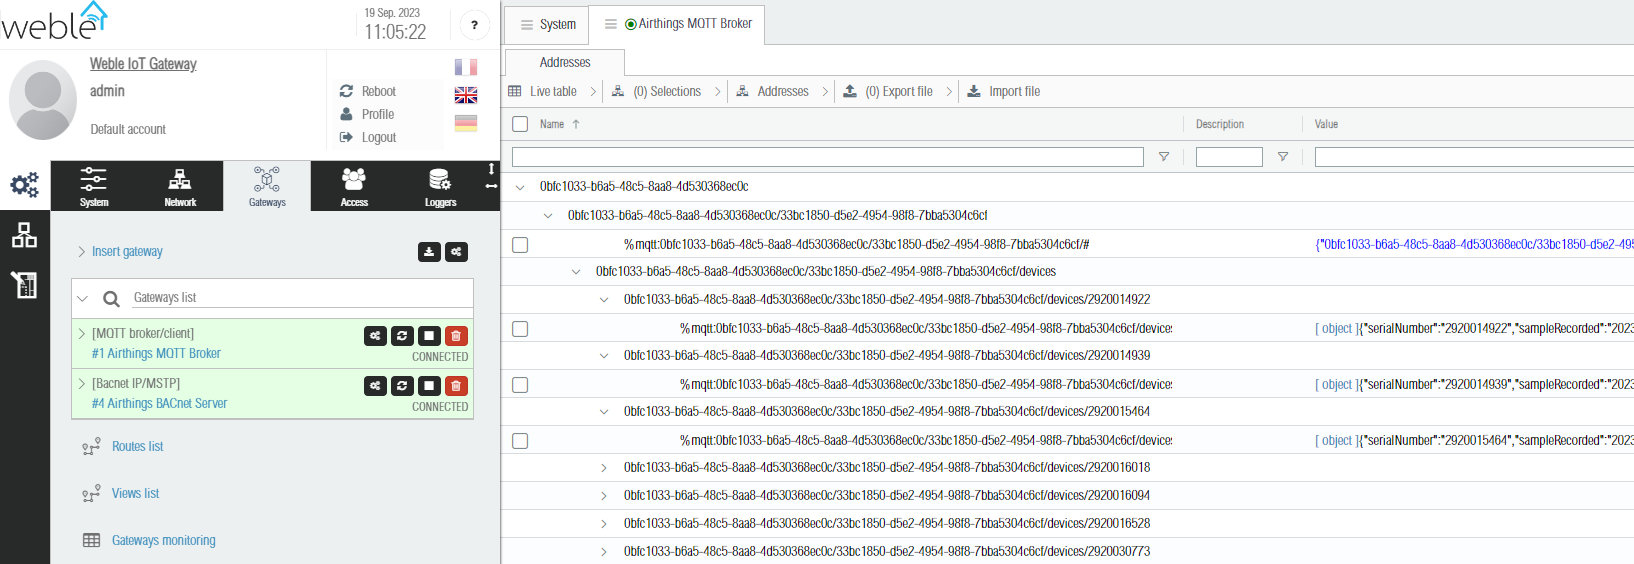
Be aware that it can take up to 5 minutes before the first data is available after the subscription is added. The data is transmitted to the device whenever samples are received by the Airthings cloud.
BACnet configuration
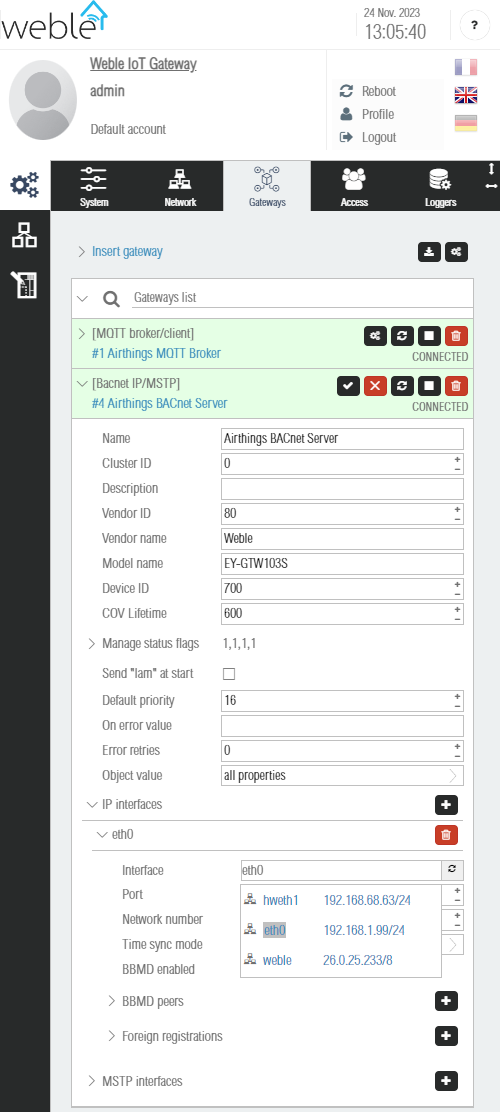
The BACnet server is configured to use the eth0 interface in the template configuration, so if you’d like to use another interface for the BACnet server, expand/edit the “Airthings BACnet Server” configuration and expand the interface. Refresh the interface field to retrieve a list of available interfaces, and select the one you’d like to use:
BACnet objects will automatically be added to the BACnet server based on the data received by the MQTT Broker. This is possible because of the dynamic route, which can be viewed by clicking Routes list under the “Gateways” tab:
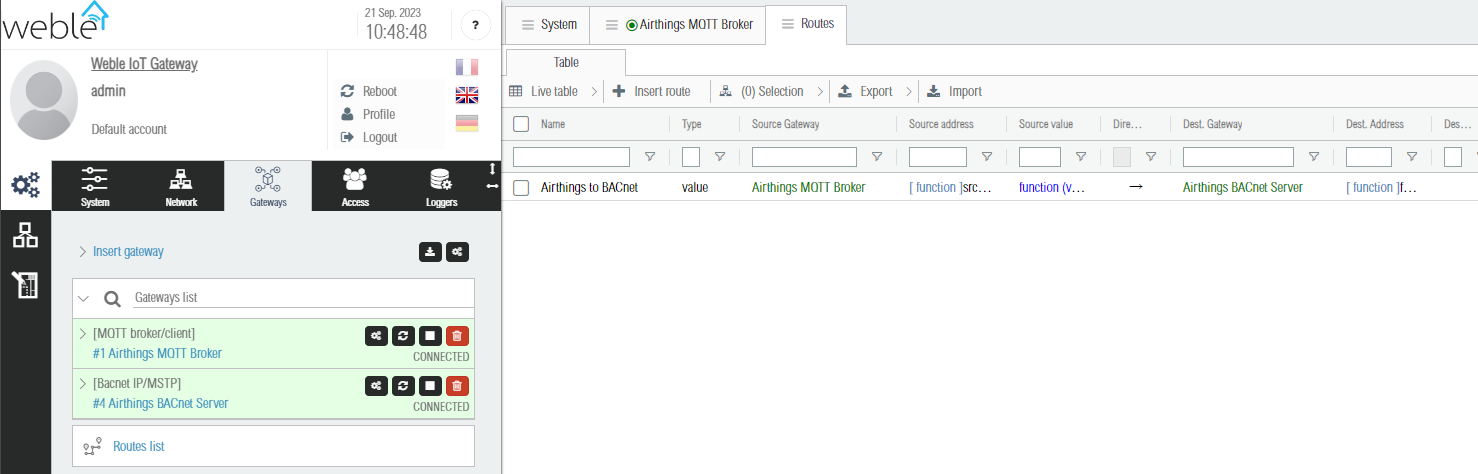
The “Source Gateway” identifies the gateway the data is collected from, and the “Dest. Gateway” identifies the gateway the data is transmitted to. “Source address”, “Source value” and “Dest. Address” contains the configuration how to add the BACnet objects and parse the data.
The configuration will allocate 20 BACnet Analog Input objects for each device, and structure them the following way:
| Object Instance | Object Name | Description | Units |
|---|---|---|---|
| AI 01 | { serialNumber } _ co2 | CO2 from Airthings device { serialNumber } | Parts per million |
| AI 02 | { serialNumber } _ humidity | Relative humidity from Airthings device { serialNumber } | Percent relative humidity |
| AI 03 | { serialNumber } _ light | Light from Airthings device { serialNumber } | Percent |
| AI 04 | { serialNumber } _ pm1 | PM1 from Airthings device { serialNumber } | Micrograms per cubic meter |
| AI 05 | { serialNumber } _ pm10 | PM 2.5 from Airthings device { serialNumber } | Micrograms per cubic meter |
| AI 06 | { serialNumber } _ pm25 | PM 10 from Airthings device { serialNumber } | Micrograms per cubic meter |
| AI 07 | { serialNumber } _ pressure | Pressure from Airthings device { serialNumber } | Pascals |
| AI 08 | { serialNumber } _ pressureDifference | Differential pressure from Airthings device { serialNumber } | Pascals |
| AI 09 | { serialNumber } _ radonShortTermAvg | Radon (rolling 24h average) from Airthings device { serialNumber } | Becquerels |
| AI 10 | { serialNumber } _ soundLevel | Sound level from Airthings device { serialNumber } | Decibels A |
| AI 11 | { serialNumber } _ temp | Temperature from Airthings device { serialNumber } | Degrees celsius |
| AI 12 | { serialNumber } _ voc | VOC from Airthings device { serialNumber } | Parts per billion |
| AI 13 | { serialNumber } _ lux | Lux from Airthings device { serialNumber } | Lux |
| AI 14..20 | N/A | N/A | N/A |
BACnet Objects for the next device will have instance number 21..40, the next after that will be 41..60, and so on. If a device is removed from the Airthings account, the BACnet objects for that device will still be available until they are manually removed, but the present value will not be updated anymore. If the same device is registered to the location again, it will resume sending data to the same objects.
Analog Input Objects 14-20 are not yet used, but they are kept available for sensors that future Airthings devices can potentially include. The objects will only be created if there are data available for the specific sensor, so if an Airthings device for instance only sample CO2, humidity and temperature, only AI 01, 02 and 11 will be created.
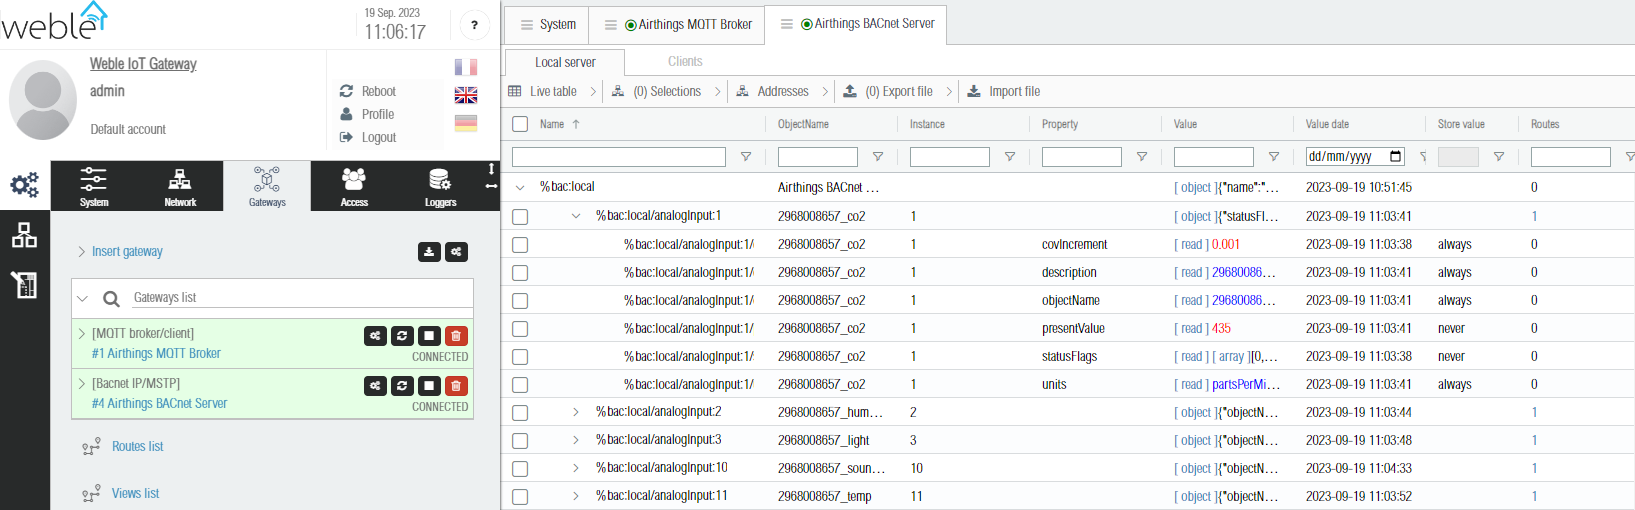
Click on the Airthings BACnet Server to view every BACnet object created, with details:
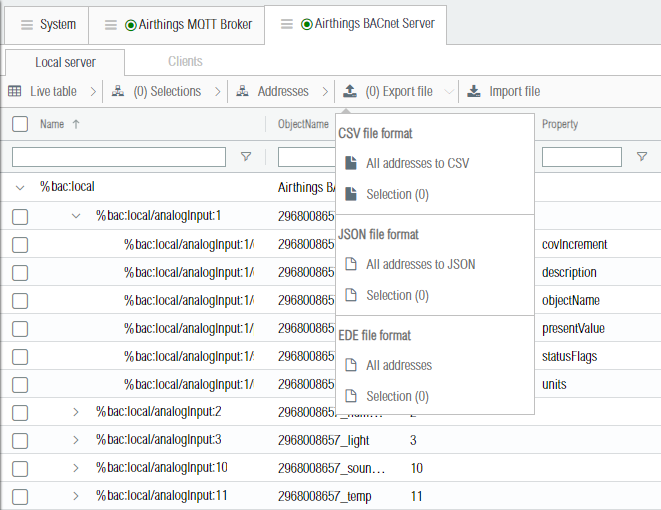
Once all the BACnet objects have been created - after receiving all available data from the Airthings cloud - you can even export the object information in EDE-format (alternatively CSV or JSON) by clicking Export file:
Backup the configuration
Since the object list is dynamically created, it is very important to save a backup after BACnet objects for the currently included Airthings devices have been created. If you have to replace the device for some reason in the future, restoring the backup will then ensure that the object instances remains so BACnet clients won’t have to edit their integration. You should also perform this action whenever new devices are being added to the Airthings location(s) the device is subscribing to data from, which is one of the reasons why the Weble remote services is strongly recommended.
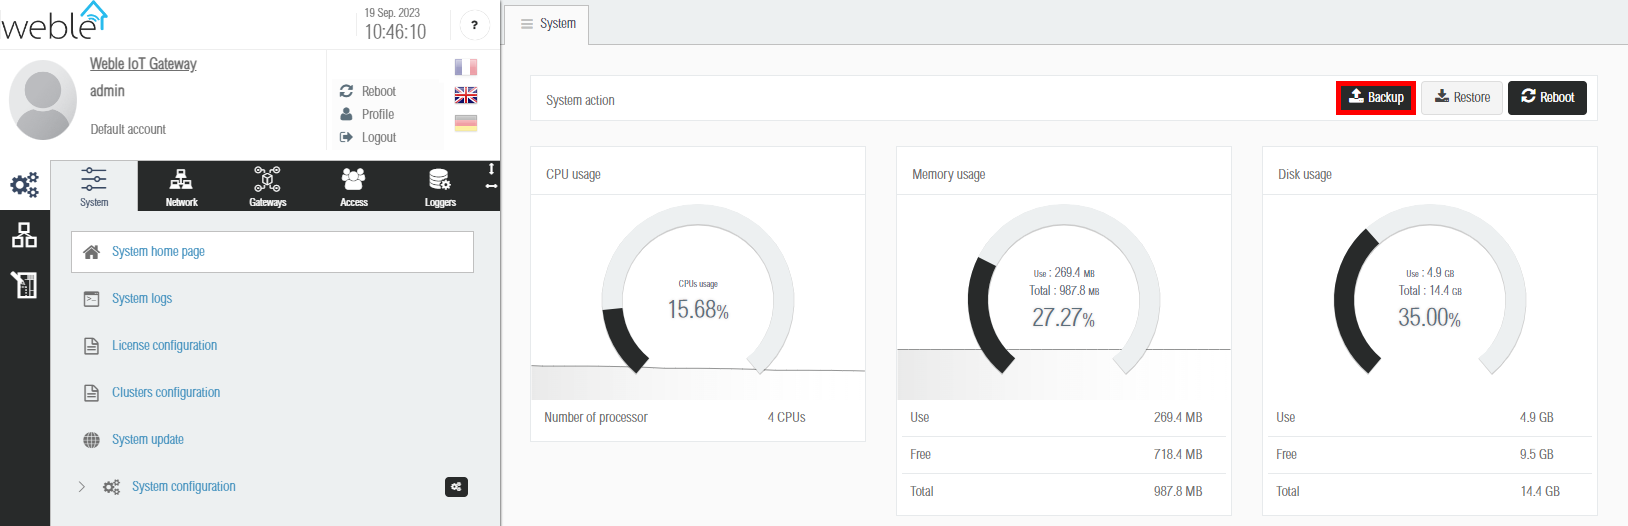
To perform a backup, head back to the System-page and click Backup to save it to your computer:
If you want to manually edit the mapping of devices to BACnet objects (advanced users only), this can be done by configuring the file named airthings_mqtt_bacnet_{routeId} located in the /data/safeFs directory in the backup. Upload the backup with an edited mapping-file and delete the existing BACnet objects from the configuration page to make the device create new objects according to the configuration file.
Updated over 1 year ago