Python & Flask guide
How to access the Airthings API using Python and Flask
Accessing the Airthings API is simple with the right tools. With a little bit of setup you can gain access to data from the Airthings Cloud, allowing you to gain even further insight into the data being retrieved by your Wave devices by allowing you to use the data for whatever you please.
Throughout this guide we will focus on using Python's Flask microframework to setup a basic web app that can serve data from the API via HTTP requests. For a step-by-step guide detailing the setup with instructions and explanations, read ahead. For those well-versed in Flask and our API, you can jump right to the end result by accessing the code for this tutorial right here.
Before you begin
To get started ensure that you have:
- Python 3 installed on the machine you want to develop on.
- Access to the Airthings API, found at dashboard.airthings.com
Creating an API Client
Before diving into the code we need to set up an API client on our account. Navigate to the integrations page and select API:
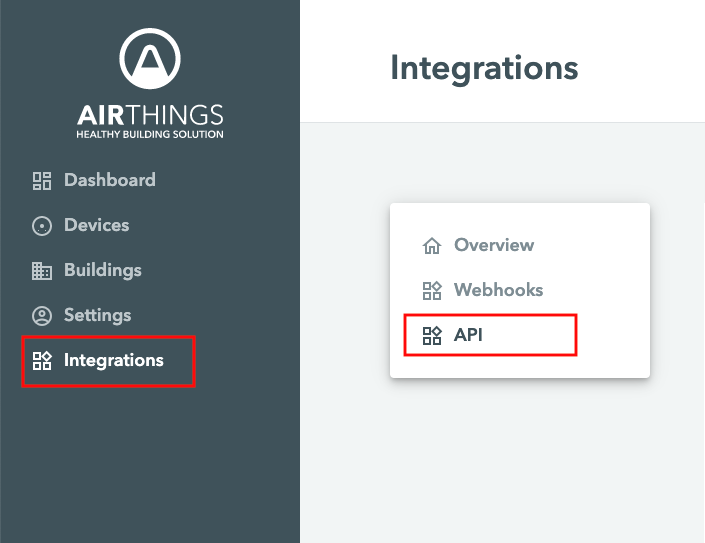
- Fill in the details within the 'Create client' form.
- Set the Redirect uri to
http://localhost:3000/callback - Set Enable client to ON
- Hit Create client
You should now have something similar to the image below:
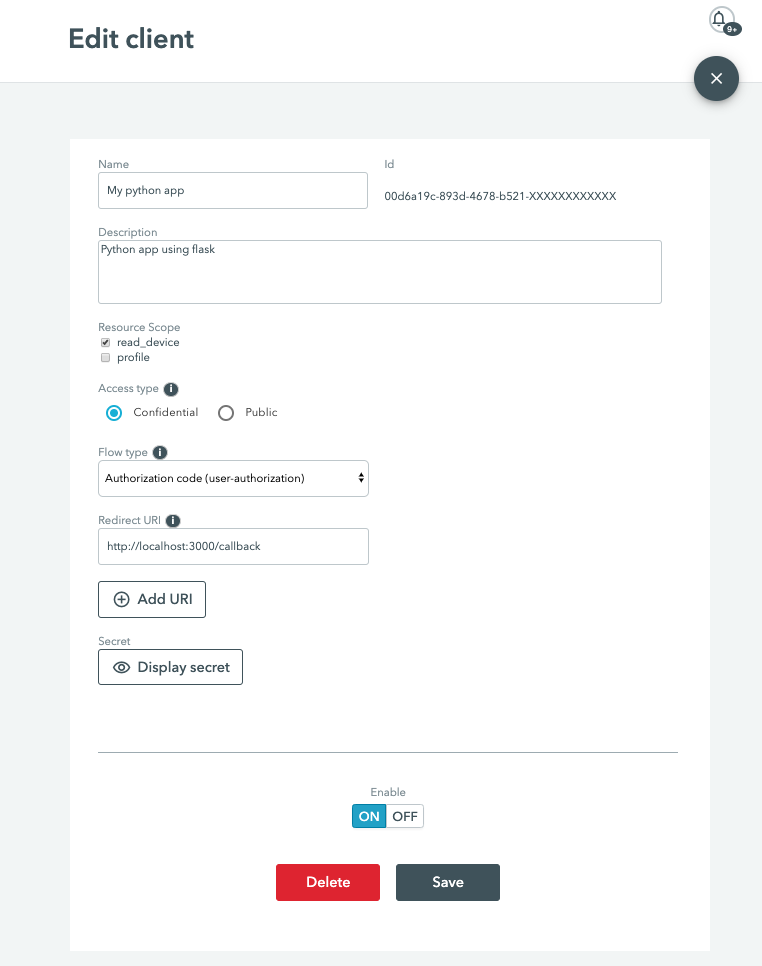
Take a note of your client id and client secret, by clicking the Display secret button. We recommend keeping these confidential to ensure your data is safe.
Setting up the development environment
Now that we've set everything up on the Airthings side we can get into setting up our own development environment. We can verify the version of Python we have installed with the following command in the command-line:
$ python --versionIf you don't have a Python version of at least 3.x, or if there's no output you'll need to install Python. Additionally, install a package manager such as pip which can be installed here. Be aware that if Python came preinstalled on your machine you most likely already have pip installed and installing another version may lead to an inconsistent system.
Installing the necessary packages
With pip up and running we can clone the aforementioned Github example and start installing the necessary packages. These are:
- Flask - the framework used to build our web app.
- requests-oauthlib - an OAuth framework that uses the oauthlib and requests packages to simplify the creation of OAuth clients.
- oauthlib - a python framework to simplify OAuth2 flows that supplements the requests-oauthlib package in this example.
The repository gives details on how to install and run the example. Once cloned, navigate to the directory you cloned the repository to and run:
pip install -r requirements.txtThis will read the requirements.txt file that was cloned with the repository and ask pip to fetch each of the packages.
Setting up the correct config
The config.json file supplied with this repository can be used to store your Airthings client id, secret and redirect uri. As mentioned previously, the client id and secret can be found under integrations on the Airthings dashboad. The purpose of each of the keys in the authorization process can be simply explained:
- Client ID: A unique identifier that allows the API to recognise your application. Also used to create authorization URLs.
- Client Secret: A unique identifier used to gain access to sensitive data, in this case your user account. The client secret must be kept confidential.
- Redirect URI: Once authorization has been completed this is where you will be redirected with an authorization code that is needed to gain access to make requests. This should be a URL that the web application can access, and not an arbitrary URL.
For this example you will only need to change the client id and client secret keys within the config.json. The redirect URI is setup correctly for this example.
An Overview of the code
A general overview of the code will allow us to understand what's going on within our web app. Even if you aren't running a Flask webapp most of this code should still be relevant.
    def getAuthorization(self):
        self.logger.info('Getting authorization from Accounts')
        try:
            authorization_url, state = self.oauth.authorization_url(self.authorization_url)
            return authorization_url
        except:
            self.logger.error('Error occurred, check if your client id, client secret or redirect URI are correct.')
            return {}
The getAuthorization function is responsible for starting the OAuth2 authorization process and will be responsible for sending us to the Airthings Accounts site to verify our account details.
After logging in we will be sent back to our redirect URI, which is http://localhost:3000/callback in this case, we will then run a function to retrieve our access tokens from the API:
def getAccessToken(self, authurl):
        if not self.client:
            authorization_response = authurl
            token = self.oauth.fetch_token(
                token_url=self.token_url,
                client_id=self.client_id,
                include_client_id=True,
                client_secret=self.client_secret,
                authorization_response=authorization_response
            )
            if token:
                self.client = self.oauth
                self.access_token = token['access_token']
                self.refresh_token = token['refresh_token']
                self.expires_in = token['expires_in']
            else:
                return json.loads('{"Error":"Token credentials incorrect. Check your secret or client id"}')
        else:
            self.logger.error('Error occurred, you have already fetched your access token.')
            return json.loads('{"Error":"Access token already fetched."}')
Running the Example
Once you've edited the config.json to your liking you can run the web app using the command:
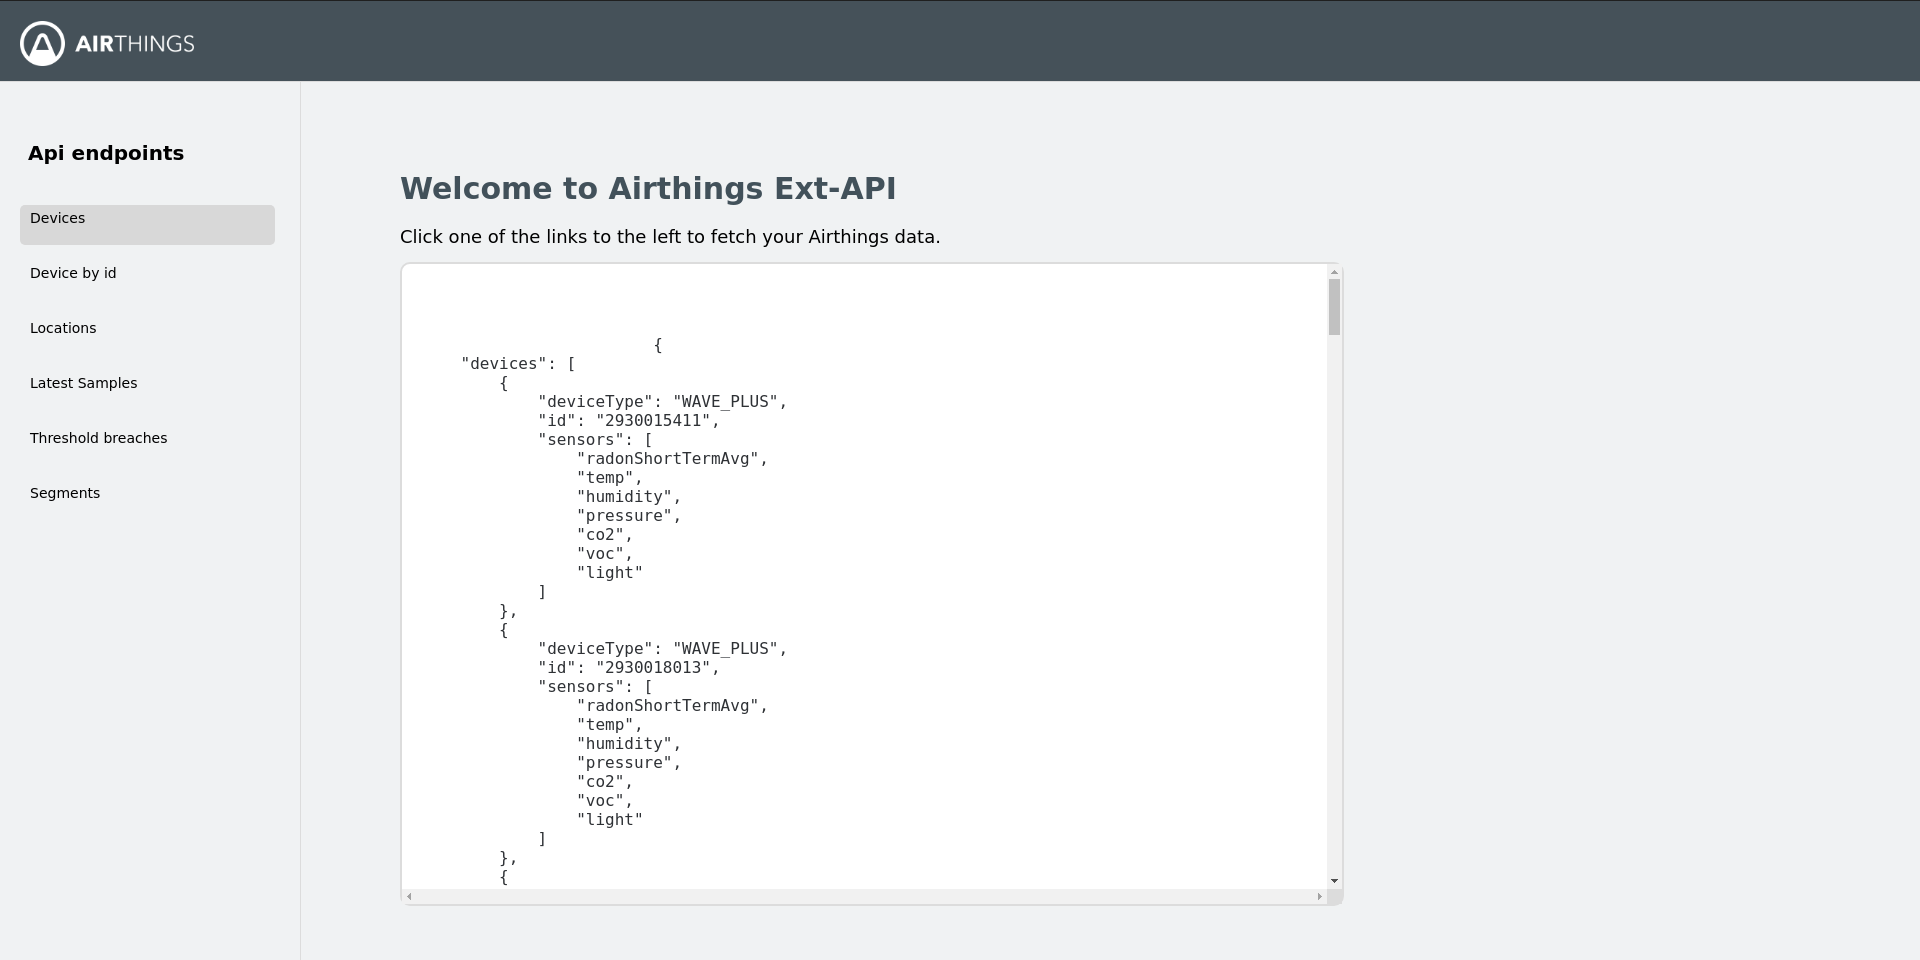
python app.pyThe flask app serves basic HTML to provide a simple interface for logging in and displaying API information. Initially, you will be greeted with a login screen which will start the authorization flow.

Next, the Airthings accounts site will attempt to verify your credentials. Log in using the same username and password used to create the API client. Once successful you should be redirected back to the web app.
You may notice that API calls that require specific device or segment numbers don't work. You can supply them yourself in the URL to test it out but since we don't have your device numbers, this is something you'll need to implement yourself.
Updated over 1 year ago