Node.js guide
An example of using Node.js to retrieve data from the Airthings API
Accessing the Airthings API is simple with the right tools. Throughout this guide, we will show you how to use the Node.js framework to set up a basic server-side application that can serve data from the Airthings API via HTTP requests.
For a step-by-step guide detailing the setup with instructions and explanation, read ahead. For those well-versed in Node.js and our API, you can jump right to the end-result by accessing the code for this tutorial right here.
Before you begin
To get started ensure that you have:
- Node.js installed on the machine you want to develop on.
- Access to the Airthings API, found at dashboard.airthings.com
Authorization Grant Flow
This example uses the Oauth2 Authorization Grant flow for user authentication. By implementing this flow, it will be possible for other users to access their data through your app. This flow is particularly meant for server-side applications,
where the source code is not exposed, and the client secret can thus be stored securely with the server.
Please note that this is a basic example created only to show how to access information from the Airthings API. Do not use this code in production without first implementing standard security within your web application. Tokens used to access data are stored directly in a server variable, and are only intended to be used by a single individual or organization. Authentication and Authorization of the frontend is out of scope for this example.
For other Oauth2 alternatives offered by Airthings, checkout the API page.
Client Credentials Flow
This example can easily be configured to support the Oauth2 Client Credentials Flow for machine-to-machine (m2m) authentication. NOTE that it is not recommended using this flow for frontend authentication to the API, only backends can maintain the integrity of a client secret. For an example of how to configure your app to support this flow, see the client credentials section in our Github page.
Creating an API Client
Before diving into the code, we need to set up an API client on our account. Navigate to the integrations page and select API Clients:
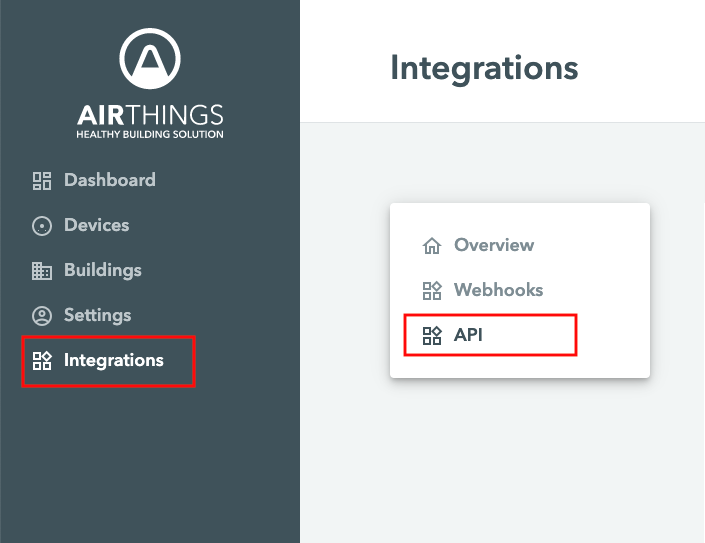
This page allows you to create one or more clients. Each client created represents a new app, each with a unique set of keys that will be used to access Airthings data.
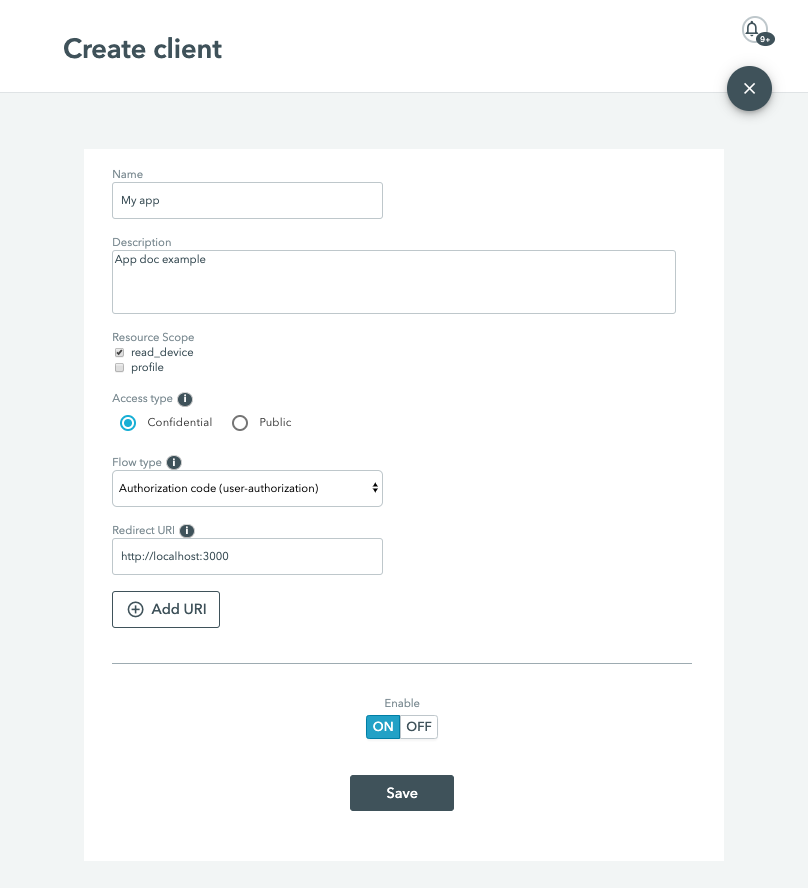
Once here fill in the details within the 'Create client' form. You can make the Client name and Client description whatever you would like. For this example, we will set the Redirect URI to http://localhost:3000/callback (note that to redirect successfully, the redirect url needs to begin with either http:// or https://). Set Access type to Confidential client (with id and secret). Next, select Flow type Authorization Code.
Ensure that the Enable client switch is set to ON. When you're ready just hit the Save button. You should end up with a similar result to the API Client created below.
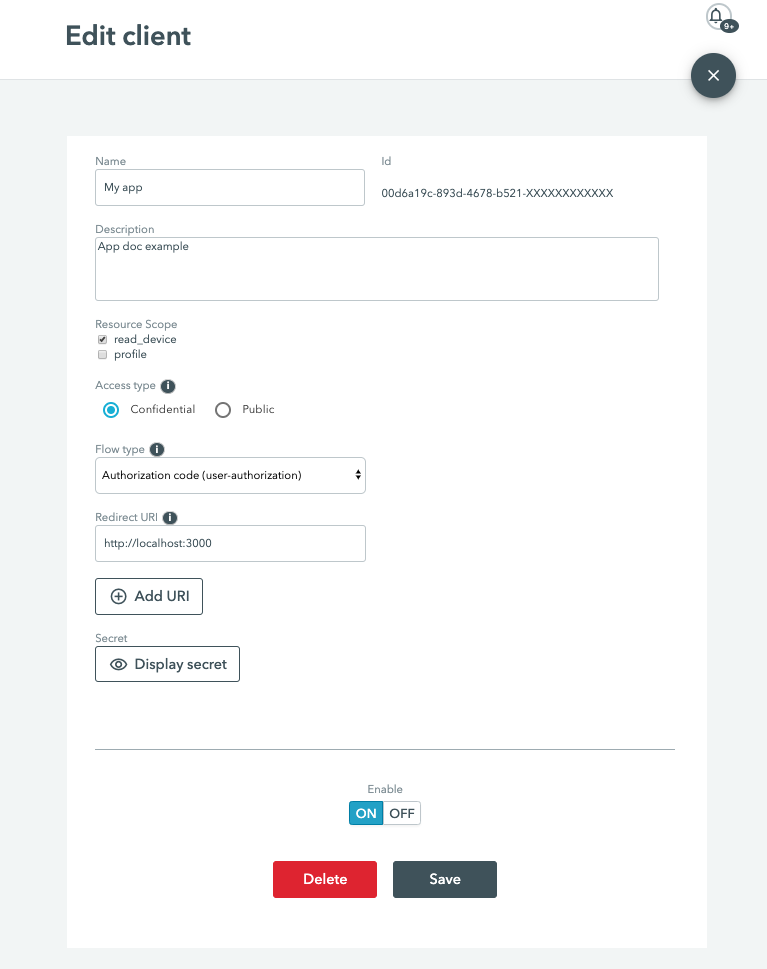
Take a note of your client id and client secret, which can be found by clicking the Display secret
button. These keys are vital for accessing the API and we heavily recommend keeping them confidential to
prevent your data from being compromised.
Installing necessary packages
After you have cloned Github example, you can start by installing the necessary packages. These are:
- simple-oauth2 - an Ouath2 framework that simplifies the requesting and renewing of access tokens.
- express - a Node.js framework that allows us to respond to HTTP requests and dynamically render HTML pages.
And a few more. All of these are automatically installed through the npm package manager.
Configure your app
For your new application to execute the Oauth2 Code flow, the code example needs to be configured with the values found in the client you created earlier. Locate and open the config.json file and update these three items: clientId, clienSecret andredirectUri.
Launching the Web app
Navigate to the root folder of the project, and start the web app with the following command:
$ node index.jsYour app should be now running! If you direct your browser to http://localhost:3000, you should see the following screen:

Click the button to login. Once you have been authenticated by Airthings, you will be redirected back to the web app. Simply click on of the items on the sidebar to fetch your Airthings data.
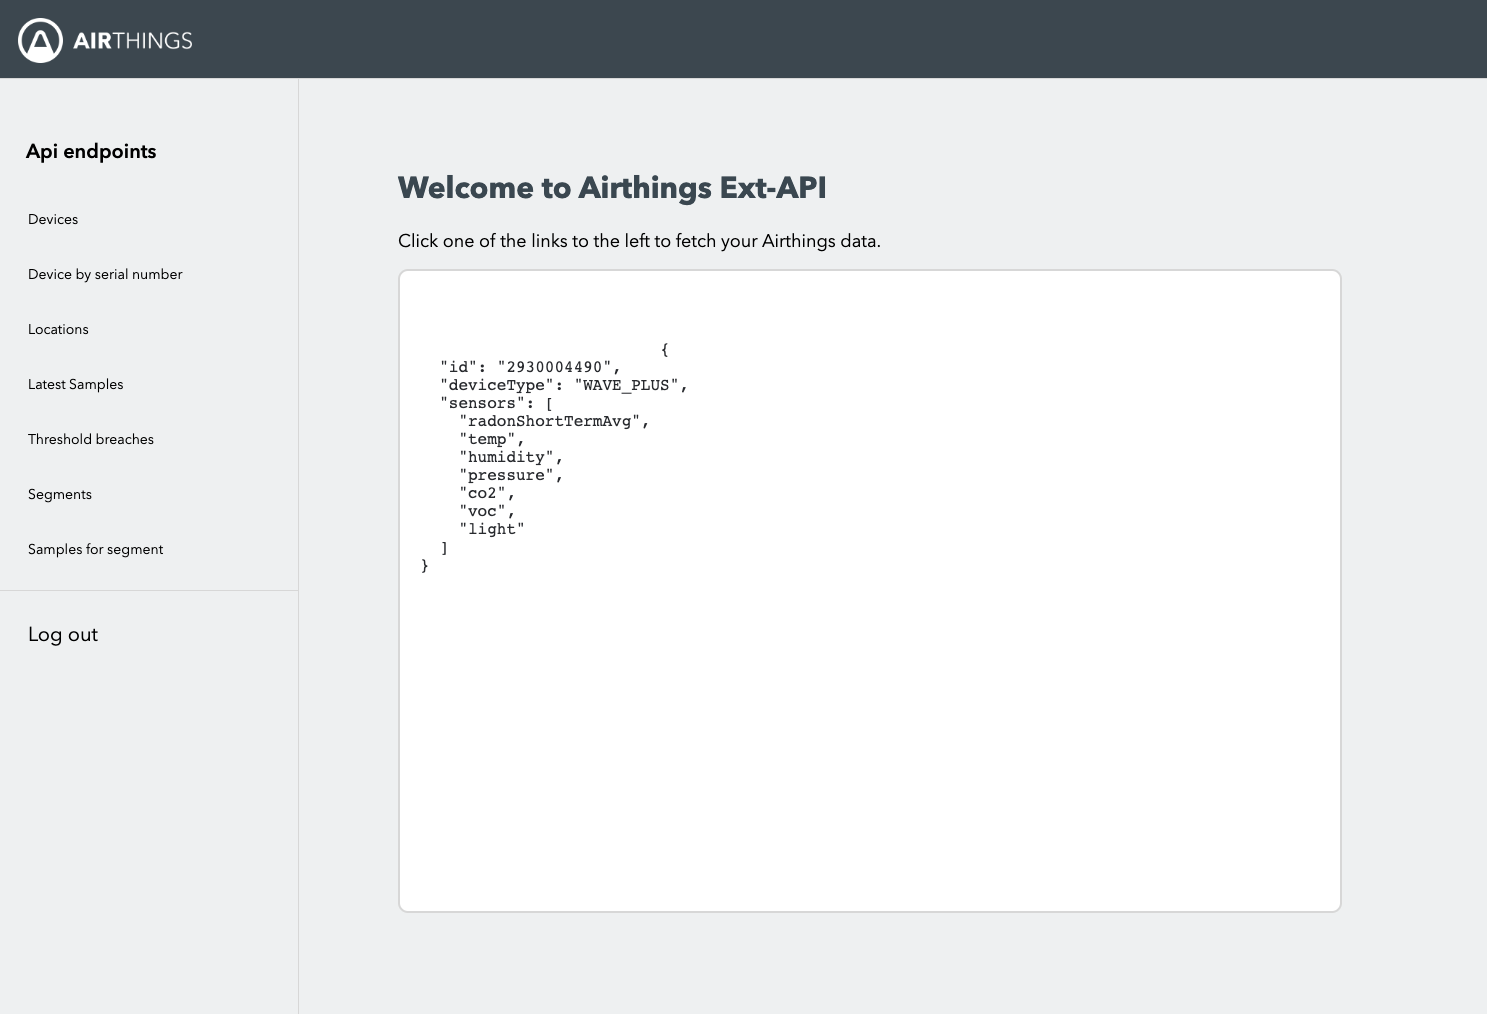
Note that this is an example application and is only meant to showcase fetching data from the Airthings API. Several of these items, such as device by serial number, contain placeholder text, which needs to be replaced by a real device id to work. For example, to fetch data for a single device, fetch all your devices, and then copy-paste one of its id's:
<a href="/devices/2930000000">Device by id</a>Application overview
The image below represents the file structure of our example application, which follows the conventions set by the Express.js community.
├── public
│   ├── css
│   │   └── **/*.css
│   └── img
│       └── **/*.png
├── views
│   ├── index.ejs
│   └── login.ejs
├── config.json
├── index.js
├── package.json
├── README.md
└── routes.js- Public: By convention, images, javascript, and CSS are stored in the public directory. When a user requests a page, express.js serves all static files used by that page.
- Views: HTML template files are locates in this folder.
The program is initiated by index.js, whereas all code pertaining to routing and Oauth2 is located in routes.js.
'use strict';
const app = require('express')();
const express = require('express');
const port = 3000;

require('dotenv').config();

app.use(require('./routes'));
app.use(express.static('public'));
app.set('view engine', 'ejs');

app.listen(port, (err) => {
  if (err) console.error(err);
  console.log(`Express server listening at http://localhost:${port}`);
});
Express is used throughout the entire application. It in the above code example, it is used to start a server at port 3000 and listen to incoming connections. When a new client connects, the program will search in routes for a valid endpoint and serve the corresponding ejs file from the views folder.
This configuration is set by app.use and app.set. In the above example we tell the server to both use the Embedded JavaScript template language, and to serve all static files from the public folder, such as CSS files and images.
Embedded JavaScript
To pass API data as variables to our pages, we must use a template engine. In our tutorial, we use Embedded JavaScript, though other alternatives exist, such as Pug and Mustache.
At runtime, the template engine replaces the variables in a template file with actual values. When the template is sent to the client, it is then transformed into an HTML file. For instance, take this code example:
app.get('/', () => {
   res.render('index', { id: "293000000" });
})
When requesting the home page, the index.ejs file will be rendered as an HTML. The variable id can be accessed in index with the following code:
<% if(id !== null) { %>
 <%= id %>
<% } %>
Updated over 1 year ago